Embarking on the delightful adventure of creating the ultimate cheese board can be as exciting as a surprise party for your taste buds! Picture an elegant spread bursting with vibrant colors, fresh ingredients, and a variety of textures that invite every guest to indulge. The ultimate cheese board isn’t just a dish; it’s a gateway to laughter, conversation, and exploration of flavors.
Jump to:
- <strong>Ingredients for Ultimate Cheese Board</strong>
- <strong>How to Make Ultimate Cheese Board</strong>
- <strong>Perfecting Ultimate Cheese Board Cooking Process</strong>
- <strong>Add Your Touch to Ultimate Cheese Board</strong>
- <strong>Storing & Reheating Ultimate Cheese Board</strong>
- FAQs About Ultimate Cheese Board
- What is Ultimate Cheese Board?
- How do I choose cheeses for an Ultimate Cheese Board?
- What else can I add to my Ultimate Cheese Board?
- How long can I leave the Ultimate Cheese Board out?
- Conclusion for Ultimate Cheese Board
Imagine gathering your loved ones around a beautifully arranged platter, sharing tales of culinary fails while savoring rich blue cheese, soft goat cheese, and a mix of sweet and savory delights. Whether it’s a cozy night in or a lively gathering, the ultimate cheese board brings everyone together for an unforgettable experience.
Why You'll Love This Ultimate Cheese Board
- This incredible Ultimate Cheese Board transforms simple everyday ingredients into restaurant-quality flavors that will blow your mind completely.
- Foolproof recipe techniques guarantee perfect results every single time, making even novice cooks feel like professional chefs instantly.
- Stunning visual appeal with gorgeous colors and mouthwatering aromas creates the ultimate Instagram-worthy dish for any special occasion.
- Endlessly adaptable for different dietary needs while working beautifully for meal prep, date nights, or entertaining large groups effortlessly.
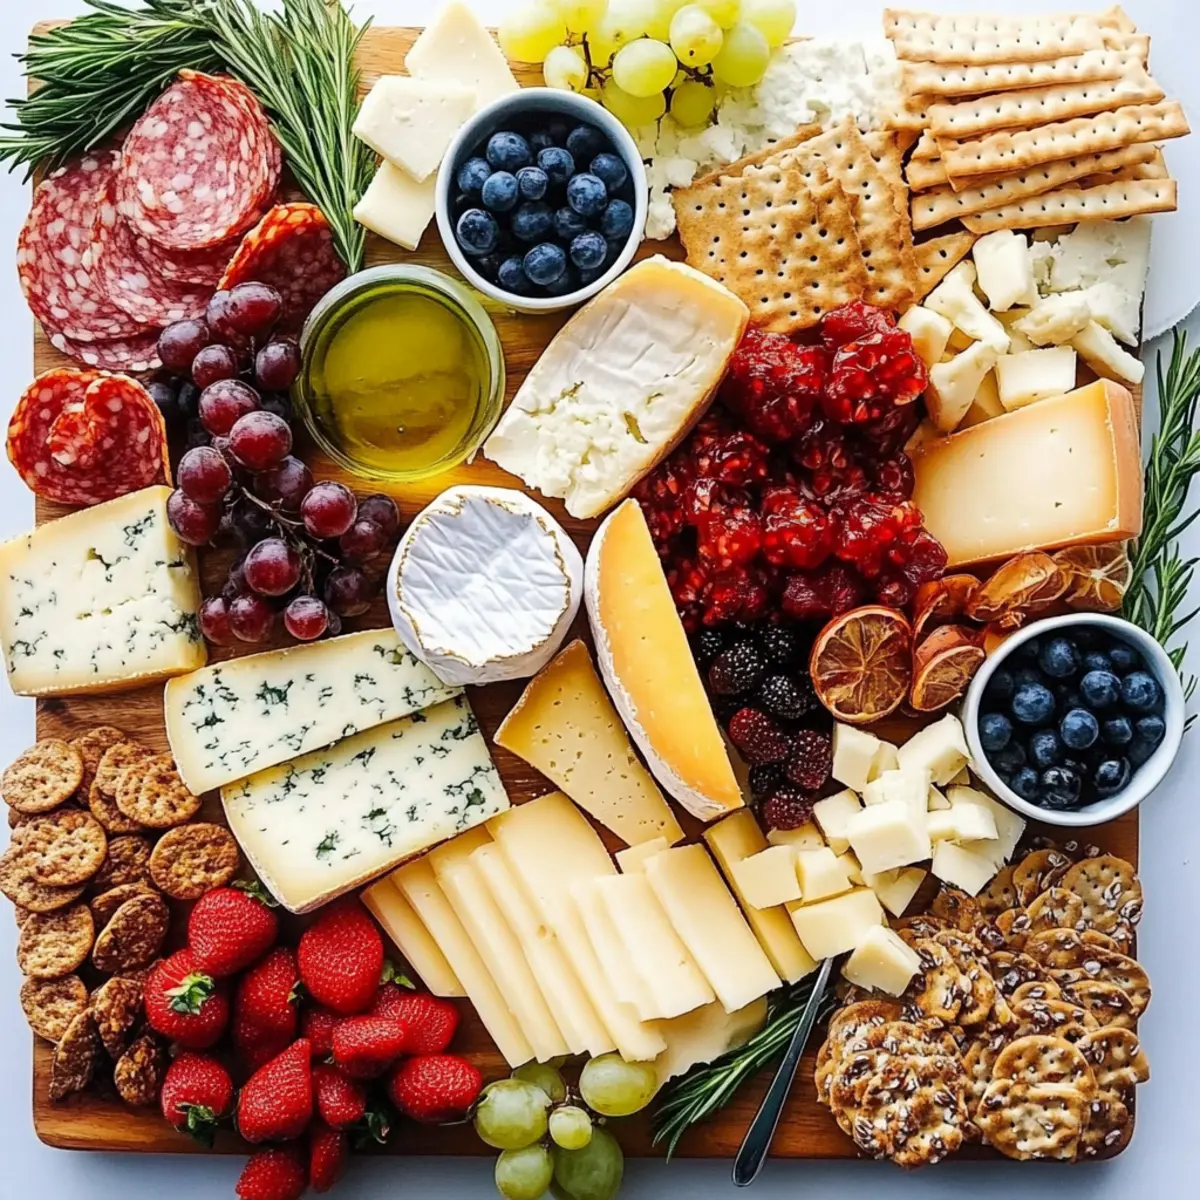
Ingredients for Ultimate Cheese Board
Here’s what you’ll need to make this delicious Ultimate Cheese Board:
4 ounces soft cheese – Opt for rich varieties like blue cheese or creamy goat cheese to add depth of flavor.
4 ounces aged cheese – Choose a robust English white cheddar or a French blue cheese for an adult twist.
4 ounces mild slicing cheese – Manchego offers a delightful balance, perfect for contrasting flavors.
4 ounces wild card cheese – Explore the cheese counter and pick something intriguing; maybe a flavored gouda or truffle-infused cheese.
Variety of breads and crackers – Crostini, focaccia bread slices, and assorted crackers add texture and crunch alongside the cheese.
Spicy mustard – A little kick from mustard complements the richness of the cheese perfectly.
Jellies or preserves – Fig, blackberry, or any fruity spread adds a sweet touch to balance the savory elements.
Seedless grapes – Plump and juicy, grapes offer a fresh, sweet contrast to the cheeses.
Sliced apples, pears, peaches, or plums – Fresh, crisp fruits add beautiful color and a refreshing bite.
Fresh berries – Raspberries, blueberries, or blackberries burst with flavor and provide lovely pops of color.
Dried or fresh figs – These sweet nuggets pair fabulously with cheeses and enhance the board’s visual appeal.
Mixed pickles – Tangy pickles add crunch and acidity, enhancing the flavors on the board.
Olives – Ripe green or black olives bring a briny contrast that pairs beautifully with cheese.
Salted nuts – Marcona almonds, pecans, or walnuts introduce a satisfying crunch and savory element.
Marinated artichokes – These tender bites elevate the flavor profile with their unique taste.
Peppadews – Sweet and peppery, they bring a fun twist to your cheese selection.
Cured meats – Prosciutto, salami, or chorizo add a savory richness that no cheese board should be without.
Fresh herbs – Rosemary or thyme sprigs beautifully garnish the board and enhance the aesthetic.
How to Make Ultimate Cheese Board
Follow these simple steps to prepare this delicious Ultimate Cheese Board:
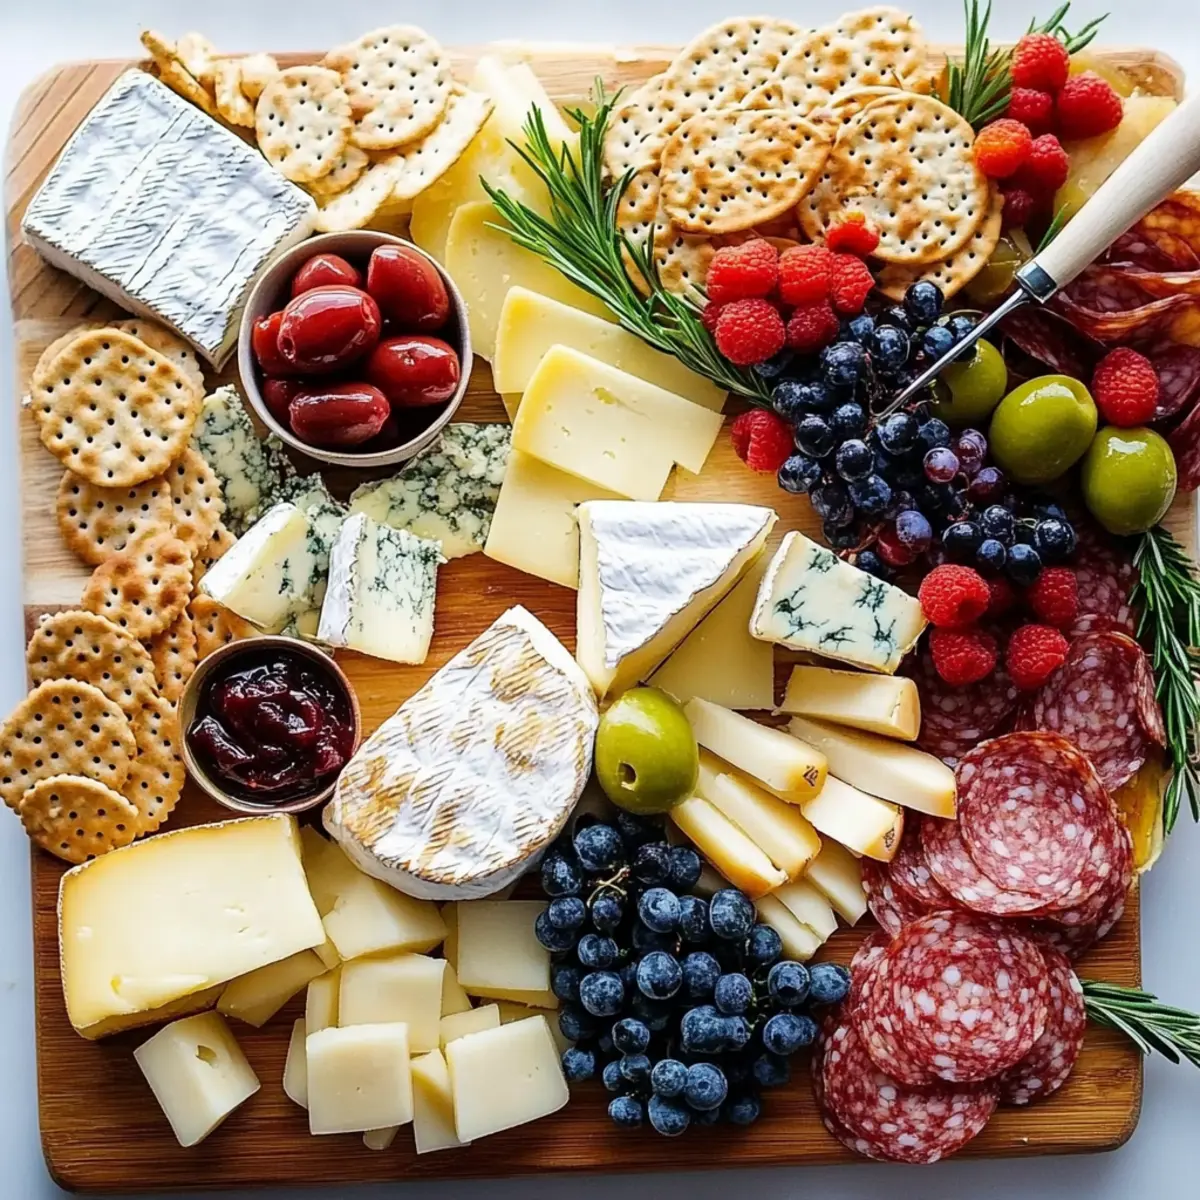
Step 1: Arrange the Cheese
Start by placing the four types of cheese onto your board. Slice the cheese that is easier to cut and leave a knife for the crumbly varieties. Position the cheeses at inviting angles, creating a visually pleasing layout that will have your guests ready to dive in.
Step 2: Add Bowls for Spreads
Next, incorporate small bowls for the ingredients that need them, like the spicy mustard, olives, and jellies. Keep in mind that the bowls should be petite to avoid overwhelming the board’s presentation.
Step 3: Fill with Fruits and Snacks
Now it’s time to play with colors and textures. Fill in the remaining space on the board with piles of fruit, crackers, and breads. Mix it up by arranging ingredients in clusters for visual interest while ensuring there’s variety in shapes and colors.
Step 4: Garnish with Fresh Herbs
Almost there! Once your board is filled, tuck a few sprigs of fresh herbs among the ingredients. This final touch adds aroma and an extra flair to your masterpiece.
Step 5: Serve with Style
Serve immediately along with small plates and forks or toothpicks to let your guests enjoy every bite. The ultimate cheese board will hold up for about two hours at room temperature, but if you’ve prepped this beauty in advance, wrap it in plastic wrap and refrigerate for up to 24 hours. Just remember to let it sit out for 30 minutes before serving to reach the perfect temperature.
Creating the ultimate cheese board is more than a recipe; it’s an invitation for laughter and indulgence! Whether for a romantic date night, a festive gathering, or just to treat yourself, this delightful cornucopia of flavors and textures is bound to impress. Now go forth, grab your cheese, and let the cheese board magic begin!
This showstopping Ultimate Cheese Board delivers restaurant-quality results using simple ingredients you probably already have at home. The perfect balance of textures and flavors creates an unforgettable dining experience that will have everyone asking for seconds. Picture-perfect presentation with vibrant colors makes this dish absolutely Instagram-worthy and guaranteed to impress any dinner guest. Incredibly versatile recipe that works beautifully for weeknight dinners, meal prep, special occasions, or even outdoor entertaining sessions.
Perfecting Ultimate Cheese Board Cooking Process
Start by arranging the cheeses on your board, followed by the bowls for mustards and jams. Layer in fruits and nuts to fill gaps, ensuring an even, colorful display. Tuck in fresh herbs for that aromatic final touch, bringing everything together beautifully.
Add Your Touch to Ultimate Cheese Board
Swap any of the cheese varieties for your favorites, like creamy brie or spicy pepper jack. Add fresh vegetables like cherry tomatoes or baby carrots for crunch and color, or include your preferred charcuterie for an extra savory twist.
Storing & Reheating Ultimate Cheese Board
Cover leftovers tightly with plastic wrap and refrigerate, ideally consuming within two days for optimal freshness. Reheat cheese options like brie in the oven briefly before serving up again, but enjoy the cold items fresh for the best flavor.
Chef's Helpful Tips for Ultimate Cheese Board
- This professional-quality Ultimate Cheese Board relies on precise timing and temperature control to achieve restaurant-standard results consistently.
- Master the art of mise en place by prepping all ingredients beforehand, ensuring smooth execution and preventing any last-minute cooking disasters.
- The secret lies in layering flavors throughout the process rather than seasoning only at the end for maximum depth.
- Pro tip: let the finished dish rest for optimal texture and flavor development before serving to hungry guests waiting eagerly.
Arranging my very first cheese board felt like preparing for a first date—nerve-wracking but exciting. The surprise on my friends’ faces when they saw it sparked such joy; their compliments truly made my day unforgettable.
FAQs About Ultimate Cheese Board
What is Ultimate Cheese Board?
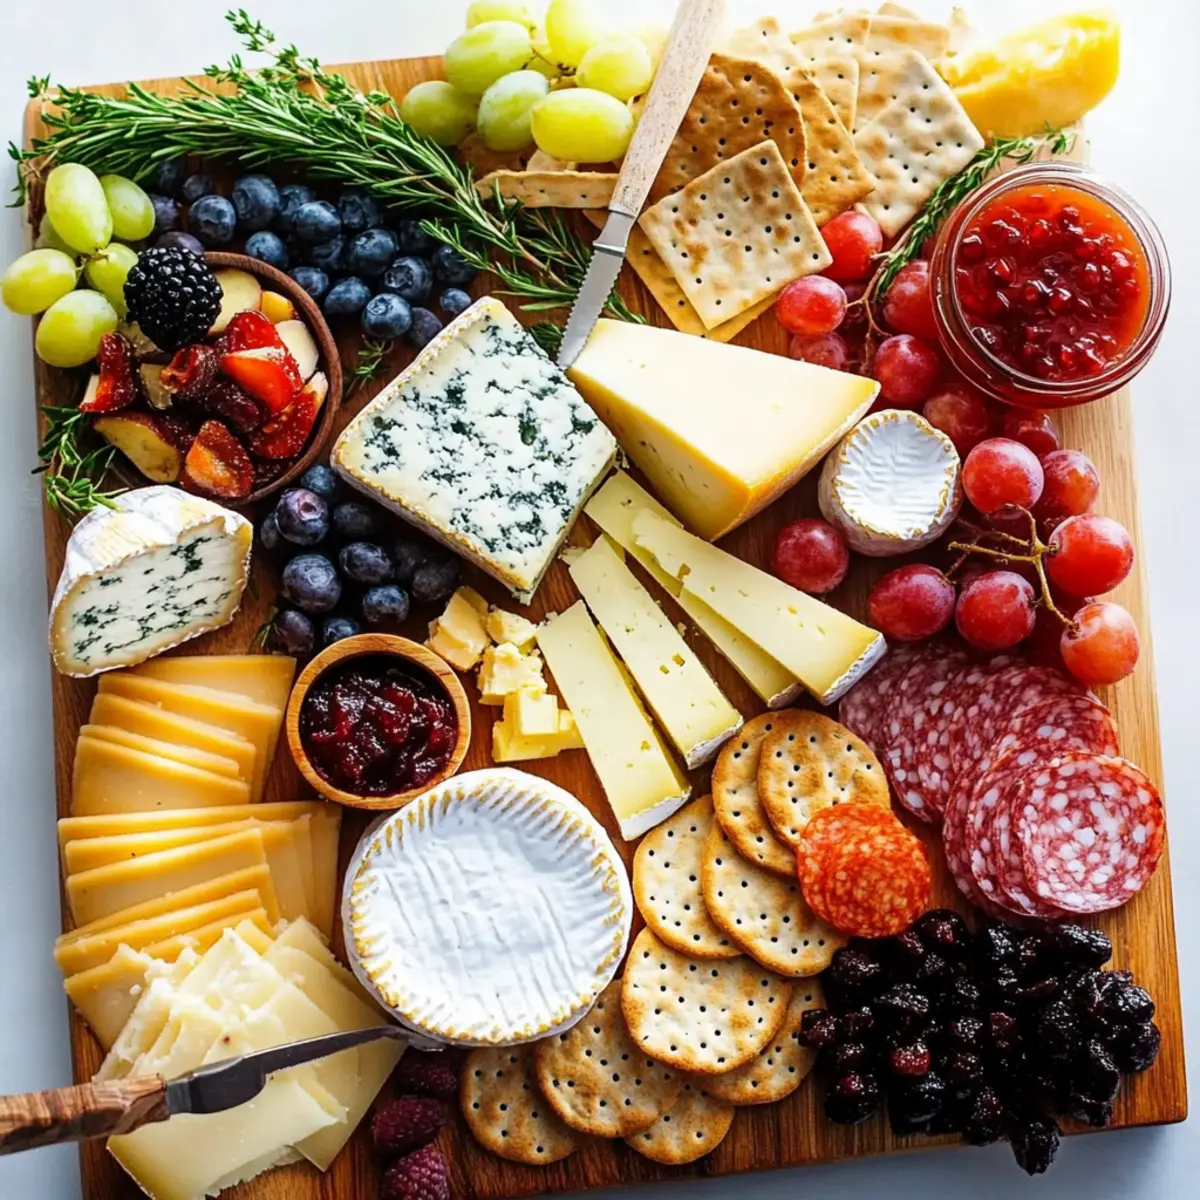
The Ultimate Cheese Board is a beautifully arranged platter featuring a selection of cheeses, charcuterie, fruits, nuts, and spreads. Its appeal lies in the variety of flavors and textures you can mix and match, creating an eye-catching presentation that elevates any gathering. Whether it’s a casual get-together or a formal celebration, this cheese board is the perfect centerpiece. With just a few minutes of prep time, you can impress your guests and indulge in delightful bites. It’s all about creativity and personalization, making it a versatile choice for any occasion.
How do I choose cheeses for an Ultimate Cheese Board?
When selecting cheeses, aim for a mix of textures and flavors. Start with a soft cheese, like goat cheese, for a creamy element. Add a sharp aged cheese, such as English cheddar, to bring depth. Incorporate a mild slicing cheese like Manchego, and finally, choose a wild card cheese that excites you—perhaps something with herbs or spiced varieties. This balance ensures a delightful experience as guests explore different tastes and enjoy the unique pairings with fruits and meats.
What else can I add to my Ultimate Cheese Board?
Your Ultimate Cheese Board can be as diverse as your imagination! Consider adding cured meats like prosciutto or salami for a savory bite. Fresh fruits, such as grapes or sliced apples, lend sweetness. For extra crunch, opt for salted nuts or pickles. Complement flavors with mustards, jellies, or fresh herbs like rosemary. The creativity in your choices will wow your guests and encourage everyone to explore combinations, enhancing the overall tasting experience.
How long can I leave the Ultimate Cheese Board out?
The Ultimate Cheese Board can remain at room temperature for up to two hours. This timeframe ensures that the cheeses and meats maintain their freshness while allowing flavors to mingle. If you’re preparing it in advance, you can assemble the board up to 24 hours ahead of time. Wrap it tightly in plastic wrap and refrigerate. Allow the board to come to room temperature for about 30 minutes before serving, ensuring a delicious experience for all your guests.
Conclusion for Ultimate Cheese Board
Creating the Ultimate Cheese Board is a fun and engaging experience that brings flavor and style to any occasion. By thoughtfully selecting a variety of cheeses, charcuterie, fruits, and accompaniments, you can craft a visually stunning platter that tantalizes the taste buds. Remember to consider your guests’ preferences when customizing the board. With this guide, you’re well on your way to impressing your friends and family while enjoying delightful bites together. Elevate your next gathering with the remarkable charm of the Ultimate Cheese Board.
Ultimate Cheese Board
Ingredients
Equipment
Method
- Start by placing the 4 types of cheese onto the board. Slice cheese that slices easily and add a knife for more crumbly cheese. Place the cheese at angles that look pleasing on the board.
- Place the ingredients that need bowls into small bowls on the board, like the mustard, olives, and jam or preserves. Make sure the bowls aren’t too large so they don’t crowd the board.
- Fill in the remainder of the space on the board with piles of fruit, crackers, breads and other items, arranging the ingredients with variation in color and shape in mind.
- Once the board is mostly complete, tuck in a few sprigs of fresh herbs to complete the tray.
- Serve immediately, with small plates, forks and toothpicks if desired. The cheese board can sit out for up to 2 hours at room temperature. Make the board up to 24 hours in advance, wrap in plastic wrap, and refrigerate; allow to come to room temperature 30 minutes before serving.