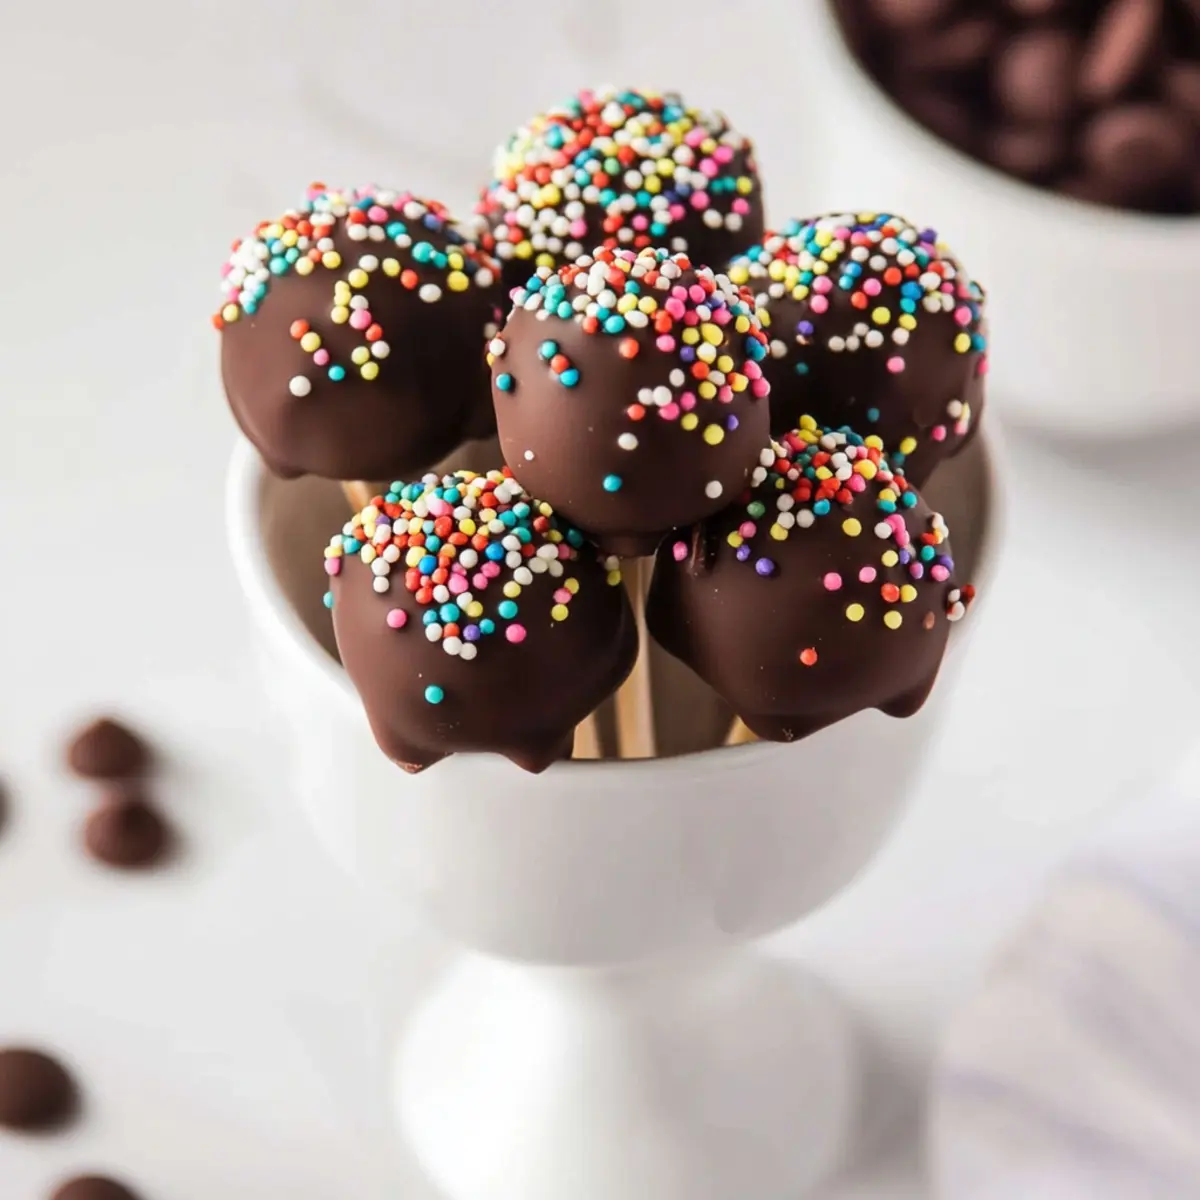
The aroma of rich chocolate wafts through the kitchen, capturing hearts and taste buds alike while you create your own delightful batch of Chocolate Cake Pops. These adorable treats, coated in velvety cake pop frosting and luscious chocolate coating, are not only a feast for the eyes but also a mouthwatering indulgence that makes every bite a joyous celebration.

Jump to:
- <strong>Ingredients for Cake Pop Frosting & Chocolate Coating</strong>
- <strong>How to Make Cake Pop Frosting & Chocolate Coating</strong>
- <strong>Perfecting Cake Pop Frosting & Chocolate Coating Cooking Process</strong>
- <strong>Add Your Touch to Cake Pop Frosting & Chocolate Coating</strong>
- <strong>Storing & Reheating Cake Pop Frosting & Chocolate Coating</strong>
- FAQs About Cake Pop Frosting & Chocolate Coating
- What is Cake Pop Frosting & Chocolate Coating?
- How can I customize my Cake Pop Frosting & Chocolate Coating?
- Can I make Cake Pop Frosting & Chocolate Coating in advance?
- What are some common mistakes to avoid with Cake Pop Frosting & Chocolate Coating?
- Conclusion for Cake Pop Frosting & Chocolate Coating
Picture this: a cozy gathering with friends, laughter filling the air as everyone indulges in these sweet, bite-sized morsels. The cake pops become the star of the show, sparking delightful conversations about childhood memories and family traditions. Trust me, these Chocolate Cake Pops are suited for any occasion, from birthday parties to casual get-togethers, or even just a weekend treat to cheer yourself up. You’ll love every sweet moment!
Why You’ll Love This Cake Pop Frosting & Chocolate Coating: This incredible Cake Pop Frosting & Chocolate Coating transforms simple everyday ingredients into restaurant-quality flavors that will blow your mind completely. Foolproof recipe techniques guarantee perfect results every single time, making even novice cooks feel like professional chefs instantly. Stunning visual appeal with gorgeous colors and mouthwatering aromas creates the ultimate Instagram-worthy dish for any special occasion. Endlessly adaptable for different dietary needs while working beautifully for meal prep, date nights, or entertaining large groups effortlessly.
Ingredients for Cake Pop Frosting & Chocolate Coating
Here’s what you’ll need to make this delicious Cake Pop Frosting & Chocolate Coating:
1 cup all-purpose flour – Essential for structure; ensure it’s leveled for accuracy.
¼ cup plus 2 tablespoons unsweetened natural cocoa powder – For that deep chocolate flavor; opt for high-quality cocoa for the best results.
¾ teaspoon baking powder – This helps the cake rise; be sure it’s fresh.
½ teaspoon baking soda – Works with the acid in buttermilk to provide lift.
½ teaspoon salt – Enhances flavors; don’t skip it.
½ cup packed light brown sugar – Adds moisture and a hint of caramel flavor.
½ cup granulated sugar – Sweetness balance; use standard granulated sugar.
⅓ cup canola or vegetable oil – Keeps the cake moist without overpowering flavors.
½ cup buttermilk – Adds tenderness and a subtle tang; substitute with milk + vinegar if unavailable.
1 large egg – Binds ingredients together for a cohesive batter.
1 teaspoon pure vanilla extract – For warmth and sweetness; always choose pure over imitation.
½ cup boiling water – Enhances the cocoa flavor and ensures a moist cake.
1 teaspoon instant espresso powder (optional) – Deepens chocolate flavor; you can skip it if you prefer.
¼ cup unsalted butter, softened – Essential for a creamy frosting; keep it at room temperature.
¾ cup powdered sugar – Creates a smooth frosting; sift to avoid lumps.
2 tablespoons unsweetened cocoa powder, sifted – Adds richness to the frosting.
1 tablespoon milk – Adjusts frosting consistency; feel free to add more if needed.
¼ teaspoon pure vanilla extract – Enhances the frosting flavor.
16 ounces semi-sweet chocolate – For the coating; melt it for that perfect dip.
1 tablespoon refined coconut oil – Adds shine and a smooth finish to the chocolate coating.
Optional: sprinkles or chopped nuts for decoration – Jazz up the presentation and add a fun crunch!
How to Make Cake Pop Frosting & Chocolate Coating
Follow these simple steps to prepare this delicious Cake Pop Frosting & Chocolate Coating:
Step 1: Prepare the Cake Batter
Preheat the oven to 350°F (180°C). Grease a 9-inch round cake pan with nonstick cooking spray and line the bottom with parchment paper. In a large mixing bowl, sift together the flour, cocoa powder, baking powder, baking soda, and salt. Whisk in the brown sugar and granulated sugar until well-combined.
Step 2: Mix the Wet Ingredients
Add the canola oil, buttermilk, egg, and vanilla extract to the dry ingredients and mix until just combined. Be careful not to over-mix; a few lumps are okay. Combine the instant espresso powder with the boiling water and stir until dissolved, then add it to the mixture. Stir gently—remember, we want a thin batter for that moist cake.
Step 3: Bake the Cake
Pour the batter into the prepared cake pan and bake for 28 to 30 minutes or until a toothpick inserted into the center comes out clean. Once baked, remove from the oven and let it cool in the pan for 30 minutes. Then run a knife around the outside, remove the cake, and cool completely on a wire rack.
Step 4: Make the Frosting
To create the frosting, beat the softened butter in a bowl until smooth. Gradually add powdered sugar and mix on low speed, then crank it up to medium for 1 to 2 minutes. Add the unsweetened cocoa powder, mixing thoroughly. Scrape down the sides of the bowl and add milk and vanilla extract, stirring until combined.
Step 5: Form the Cake Balls
Use your hands to crumble the cooled cake into small pieces in a mixing bowl. Add ½ cup of the chocolate frosting to the crumbled cake and mix until it resembles cookie dough. Roll this mixture into 1-tablespoon-sized balls and place them on a parchment-lined baking sheet. Freeze the cake balls for an hour to firm up.
Step 6: Coat the Cake Pops
Melt down the semi-sweet chocolate and coconut oil together in a microwave-safe bowl in 30-second intervals, stirring until smooth. Dip the end of a lollipop stick into the melted chocolate, then insert it into the center of a cake ball. Coat the entire cake pop in chocolate, being careful to leave the stick uncovered. Tap the stick to remove any excess coating and add sprinkles if desired.
Transfer the coated cake pops to a styrofoam block to set. Repeat the process with the rest of the cake balls, allowing them to set at room temperature for at least 30 minutes before serving. Now, isn’t that a sweet way to make memories? Enjoy!

You Must Know About Cake Pop Frosting & Chocolate Coating
- This showstopping Cake Pop Frosting & Chocolate Coating delivers restaurant-quality results using simple ingredients you probably already have at home.
- The perfect balance of textures and flavors creates an unforgettable dining experience that will have everyone asking for seconds.
- Picture-perfect presentation with vibrant colors makes this dish absolutely Instagram-worthy and guaranteed to impress any dinner guest.
- Incredibly versatile recipe that works beautifully for weeknight dinners, meal prep, special occasions, or even outdoor entertaining sessions.
Perfecting Cake Pop Frosting & Chocolate Coating Cooking Process
Start by baking your chocolate cake, allowing it to cool completely before crumbling. While the cake cools, prepare the frosting for mixing. Once everything is ready, mold the cake pops and coat them in melted chocolate for the ultimate indulgence.
Add Your Touch to Cake Pop Frosting & Chocolate Coating
Get creative with your cake pops by using different flavors of cake, adding a pinch of cinnamon or nutmeg to the frosting, or even incorporating chopped candy bars into the cake mix for extra crunch.
Storing & Reheating Cake Pop Frosting & Chocolate Coating
Store leftover cake pops in an airtight container in the refrigerator for up to a week. If you’re planning to freeze them, place them in a single layer in a freezer-safe container, separating layers with parchment paper.
Chef's Helpful Tips for Cake Pop Frosting & Chocolate Coating
- This professional-quality Cake Pop Frosting & Chocolate Coating relies on precise timing and temperature control to achieve restaurant-standard results consistently.
- Master the art of mise en place by prepping all ingredients beforehand, ensuring smooth execution and preventing any last-minute cooking disasters.
- The secret lies in layering flavors throughout the cooking process rather than seasoning only at the end for maximum depth.
- Pro tip: let the finished dish rest for optimal texture and flavor development before serving to hungry guests waiting eagerly.
Creating cake pops has become a fond memory for me. My friends still rave about that birthday party when the kids couldn’t stop asking for more, and the adults secretly snuck a few, too!
FAQs About Cake Pop Frosting & Chocolate Coating
What is Cake Pop Frosting & Chocolate Coating?
Cake Pop Frosting & Chocolate Coating is a delicious combination designed to elevate cake pops from simple to sensational. The frosting, typically made from butter, powdered sugar, and cocoa, serves to bind crumbled cake and give it a rich flavor. After shaping the pops, they are dipped in a chocolate coating that hardens to create a perfect bite-sized dessert. This duo not only enhances the taste but also provides an attractive, glossy finish, making your cake pops visually appealing and irresistibly delicious.
How can I customize my Cake Pop Frosting & Chocolate Coating?
Customizing your Cake Pop Frosting & Chocolate Coating is a delightful way to make the treats uniquely yours. Start by experimenting with different flavors of cake, such as red velvet or lemon. You can also add extracts like almond or peppermint to the frosting. For the coating, consider white chocolate or colored candy melts for a fun touch. Finally, top your pops with chopped nuts, sprinkles, or edible glitter to create a festive look. The possibilities are endless, and each variation brings new flavors and excitement!
Can I make Cake Pop Frosting & Chocolate Coating in advance?
Certainly! You can prepare the Cake Pop Frosting in advance by storing it in an airtight container in the fridge for up to one week. Just be sure to allow it to come to room temperature and re-whip it before using. As for the chocolate coating, you can melt it ahead of time and keep it warm in a slow cooker or over a double boiler. Just make sure to stir it regularly and avoid overheating. Preparing these components in advance can save you time on party day!
What are some common mistakes to avoid with Cake Pop Frosting & Chocolate Coating?
When making Cake Pop Frosting & Chocolate Coating, there are a few common pitfalls to watch out for. Firstly, avoid using dry cake crumbs; the mixture should resemble cookie dough. Secondly, do not overheat your chocolate, as it can burn easily. Additionally, when dipping, ensure the cake pops are cold to prevent the coating from melting off. Finally, resist the urge to overload your cake pops with too much frosting, as this can result in an unbalanced bite. Keeping these tips in mind will help you create flawless cake pops!
Conclusion for Cake Pop Frosting & Chocolate Coating
In conclusion, mastering Cake Pop Frosting & Chocolate Coating transforms your sweet treats into a showstopper at any gathering. With the right ingredients, a little creativity, and attention to detail, you can craft delicious cake pops that are as stunning as they are flavorful. Don’t hesitate to experiment with flavors and coatings to make them your own. Remember, the joy of creating and sharing these delightful bites is what truly makes them special!
Homemade Chocolate Cake Pops
Ingredients
Equipment
Method
- Preheat the oven to 350°F (180°C). Grease a 9-inch round cake pan with nonstick cooking spray, line the bottom of the pan with parchment paper, and set aside.
- In a large mixing bowl, sift together the flour, cocoa powder, baking powder, baking soda, and salt. Whisk in the brown sugar and granulated sugar until well combined.
- Add the oil, buttermilk, egg, and vanilla extract to the dry ingredients and mix until just combined.
- Add the instant espresso powder to the boiling water and mix until fully dissolved. Add to the mixing bowl and mix until everything is just combined. The batter will be thin.
- Pour the batter into the prepared cake pan.
- Bake for 28 to 30 minutes or until a toothpick inserted into the center comes out clean. Remove from the oven and let cool in the pan for 30 minutes.
- Run a knife around the outside, remove the cake, and cool completely on a wire rack.
- To make the frosting, beat the softened butter until smooth. Add powdered sugar and mix on low speed, then increase to medium speed for 1 to 2 minutes.
- Mix in cocoa powder until combined. Scrape down the sides of the bowl, then add milk and vanilla extract, mixing until fully combined.
- Crumble the cooled cake into small pieces in a mixing bowl. Add ½ cup of the chocolate frosting and mix until fully combined, resembling cookie dough.
- Roll the mixture into 1-tablespoon-sized balls and place on a parchment-lined baking sheet. Freeze for 1 hour.
- Melt the chopped semi-sweet chocolate and coconut oil in a microwave-safe bowl in 30-second intervals, stirring until smooth.
- Transfer some melted chocolate into a tall cup. Allow to cool slightly for about 10 minutes.
- Remove 4 to 5 cake balls from the freezer. Dip the end of a lollipop stick into melted chocolate, then insert into the center of a cake ball.
- Dip the cake pop into the melted chocolate until fully covered (not the stick). Tap the stick to remove excess chocolate. Add sprinkles if desired.
- Stick the coated cake pops into a styrofoam block to set. Repeat with remaining cake balls. Allow to set at room temperature for at least 30 minutes.