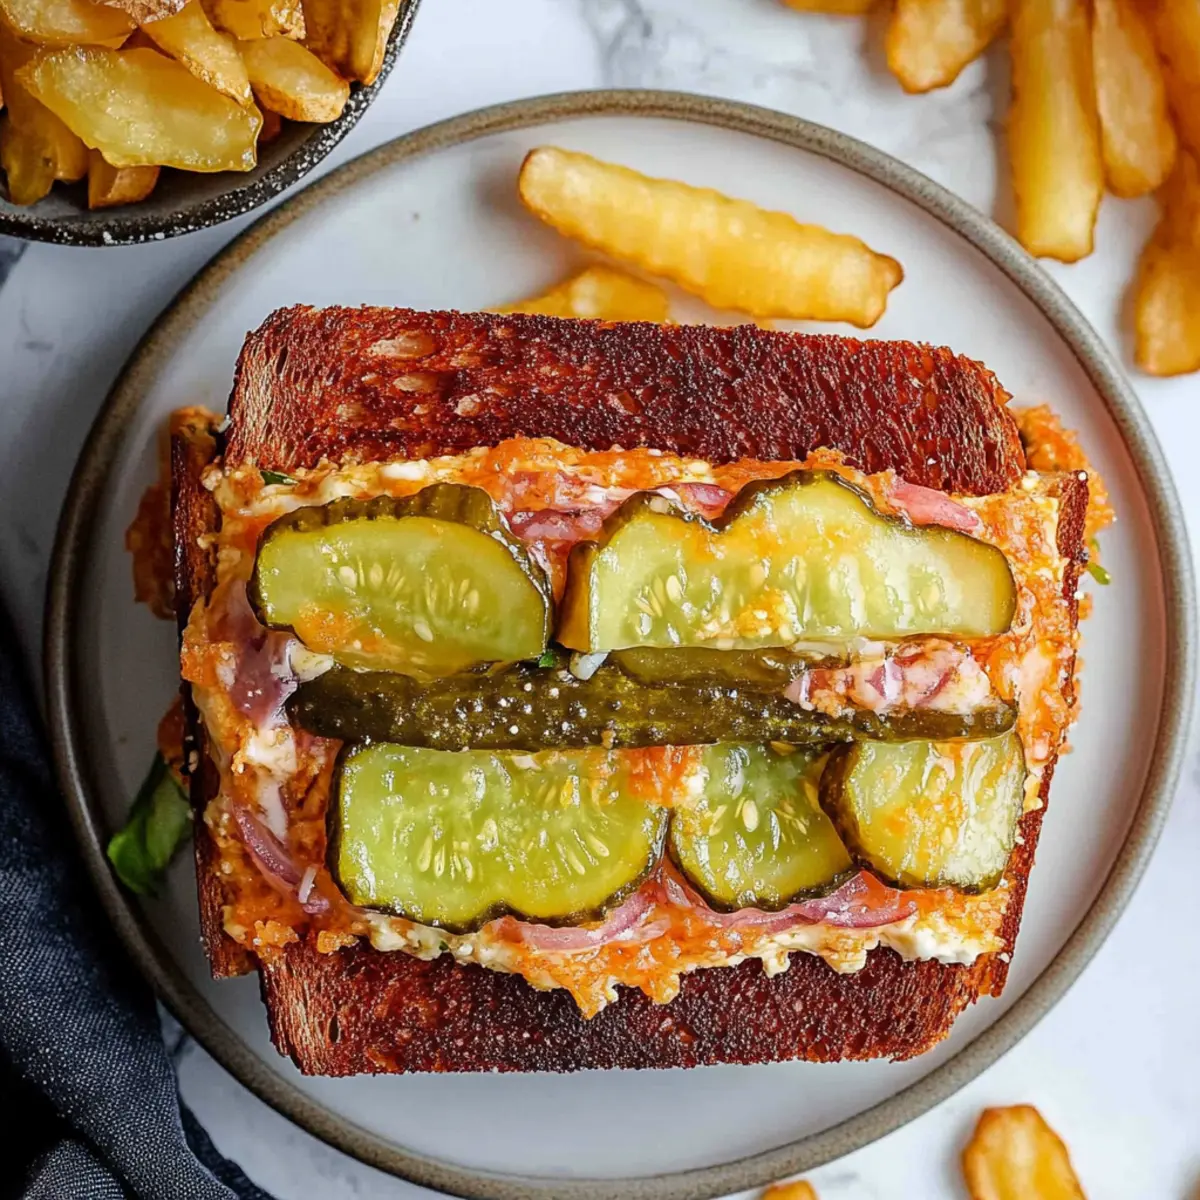
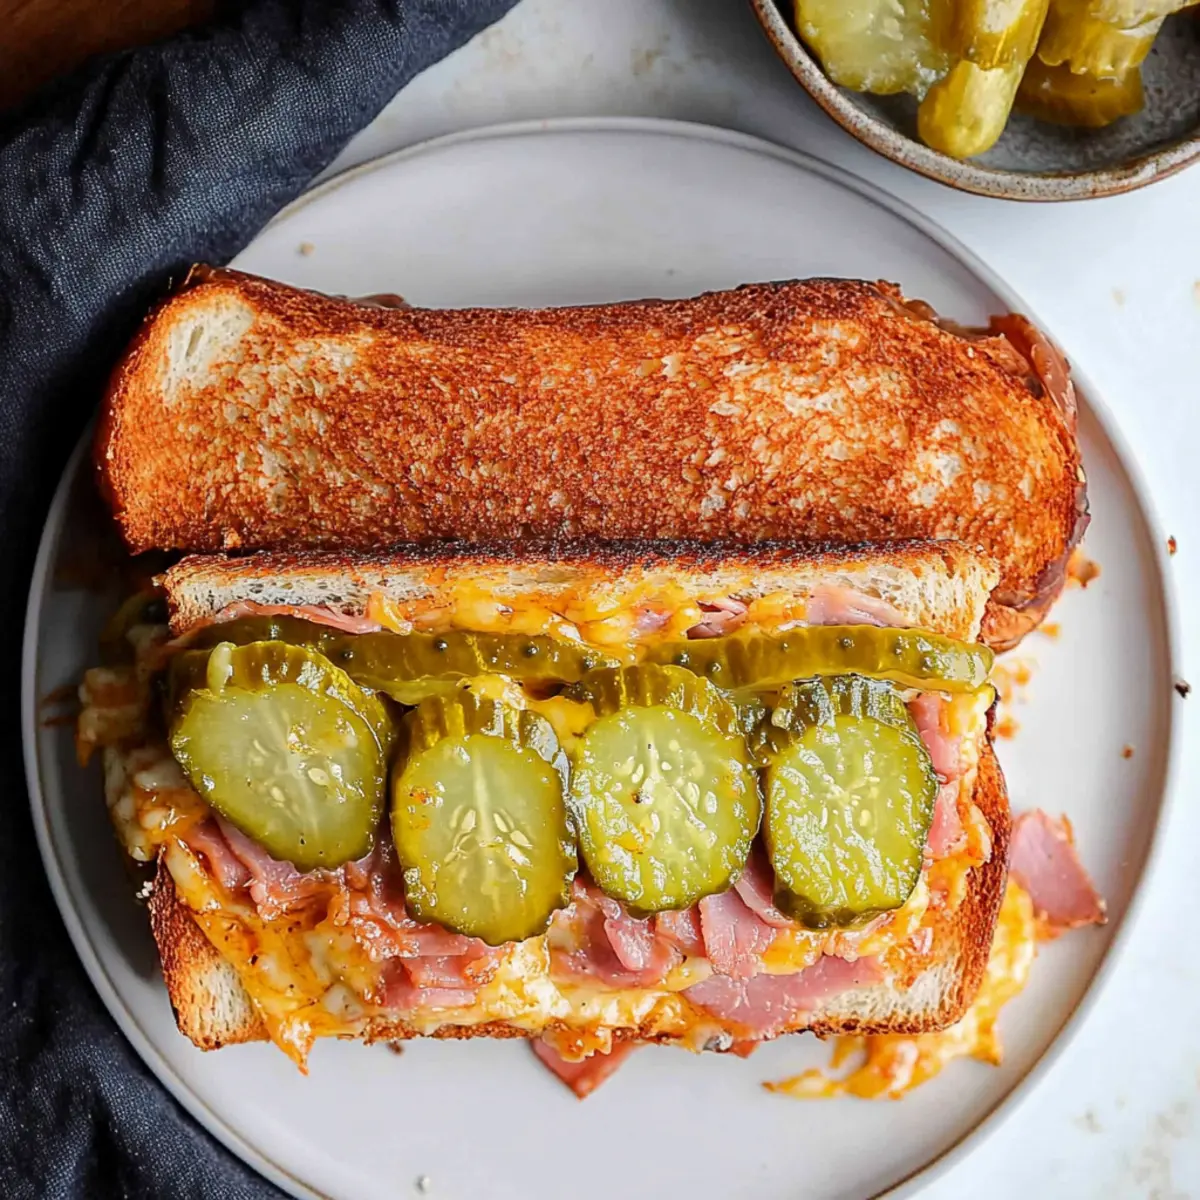
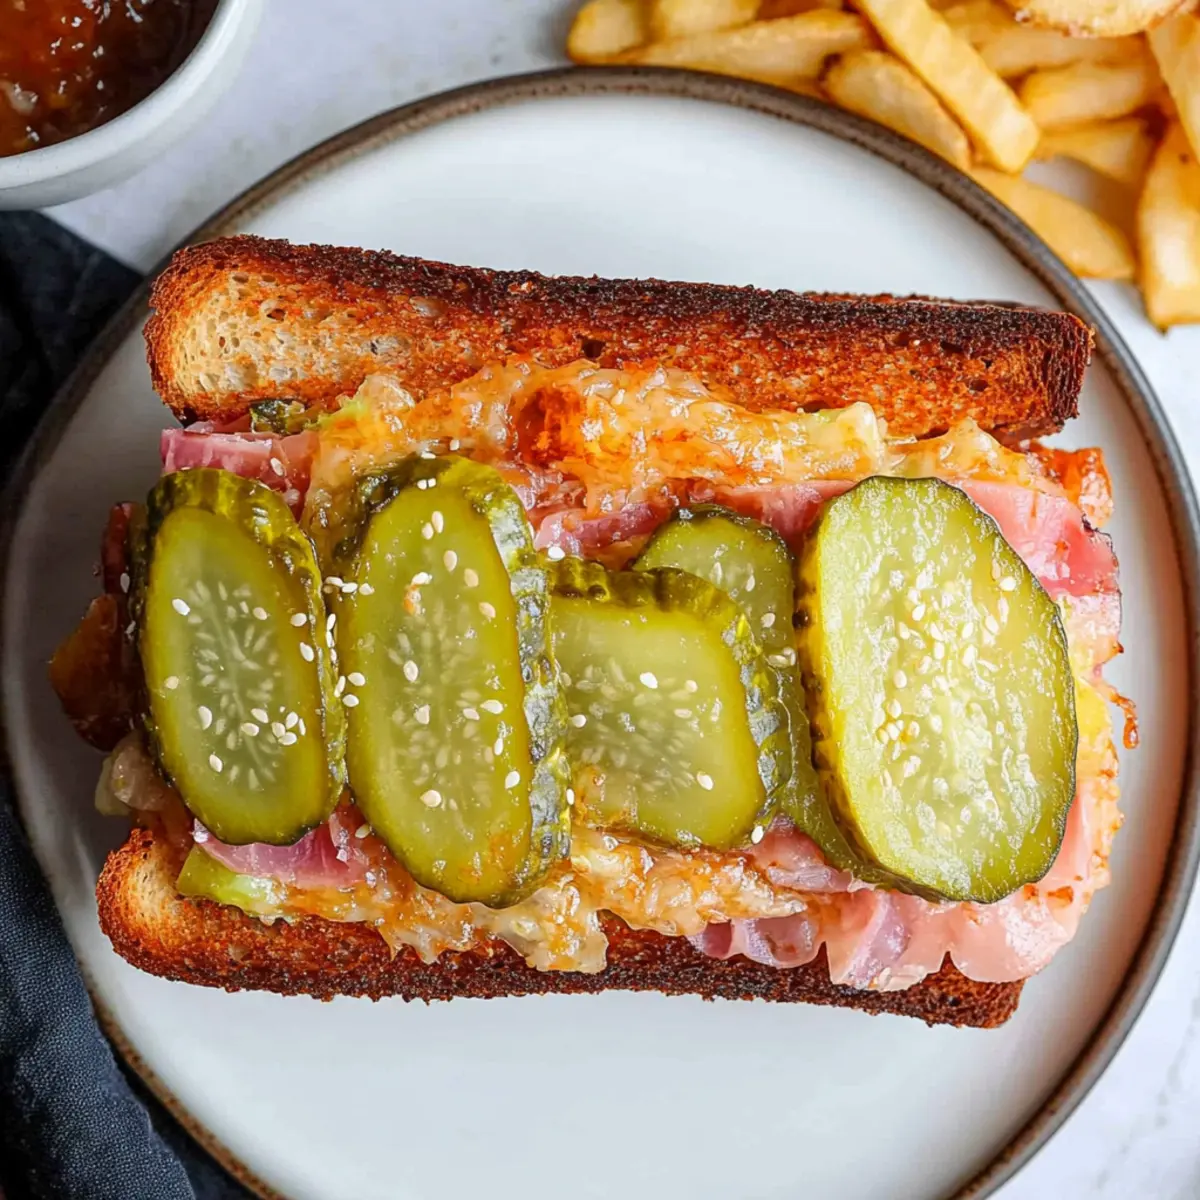
When hunger strikes and you’re in the mood for something uniquely satisfying, the viral pickle sandwich will be your new go-to delight. Just imagine biting into crispy, cheesy goodness layered with fresh vegetables and meats, all sandwiched between two baked pickle layers. This dish is not just a meal; it’s a culinary adventure packed with flavors that dance on your palate.
Jump to:
- <strong>Ingredients for Viral Pickle Sandwich</strong>
- <strong>How to Make Viral Pickle Sandwich</strong>
- <strong>Perfecting Viral Pickle Sandwich Cooking Process</strong>
- <strong>Add Your Touch to Viral Pickle Sandwich</strong>
- <strong>Storing & Reheating Viral Pickle Sandwich</strong>
- FAQs About Viral Pickle Sandwich
- What is Viral Pickle Sandwich?
- How do I store leftovers of Viral Pickle Sandwich?
- Can I customize the ingredients of Viral Pickle Sandwich?
- Is the Viral Pickle Sandwich suitable for meal prep?
- Conclusion for Viral Pickle Sandwich
Now, if you’re anything like me, you know that fast food just doesn’t cut it anymore. As I rummaged through my fridge one day, I stumbled upon some pickles and an impressive dinner team of meats and cheeses. I decided to let my culinary curiosity run wild and, voilà, the viral pickle sandwich was born! It’s the perfect dish for casual gatherings or when you want to impress friends without breaking a sweat.
Why You'll Love This Viral Pickle Sandwich
- This incredible Viral Pickle Sandwich transforms simple everyday ingredients into restaurant-quality flavors that will blow your mind completely.
- Foolproof recipe techniques guarantee perfect results every single time, making even novice cooks feel like professional chefs instantly.
- Stunning visual appeal with gorgeous colors and mouthwatering aromas creates the ultimate Instagram-worthy dish for any special occasion.
- Endlessly adaptable for different dietary needs while working beautifully for meal prep, date nights, or entertaining large groups effortlessly.
Ingredients for Viral Pickle Sandwich
Here’s what you’ll need to make this delicious Viral Pickle Sandwich:
6-8 sandwich slice pickles – Opt for thick stackers like Vlasic for the best crunch. They’re the stars that hold this creation together.
1 cup medium cheddar cheese – Shredded for easy melting, this cheese adds a rich, creamy texture to balance the tanginess of the pickles.
8 slices genoa salami – This adds a delightful, savory flavor that complements other ingredients beautifully.
8 slices pepperoni – For that extra kick and a burst of flavor. These little circles of delight will bring a comfortable, familiar taste.
4 slices turkey – Lean and delicious, turkey will add heartiness without overshadowing the other flavors.
1/2 head iceberg lettuce – Finely shredded, it’s perfect for adding that fresh crunch!
1/4 red onion – Thinly sliced for a slight bite, the onion rounds out the flavors and adds brightness.
1/3 cup banana peppers – Chopped for just the right amount of tang and heat.
1/2 tomato – Sliced, fresh tomato adds juicy sweetness.
3 tablespoons mayonnaise – A creamy base that helps bind everything together.
1-2 tablespoons red wine vinegar – A splash of acidity that brightens the entire sandwich.
1/4 cup parmesan cheese – Freshly grated for topping, it will add a nutty, salty finish to the dish.
1/4 tsp garlic powder – A sprinkle of garlic flavor enhances every bite.
3/4 tsp Italian seasoning – This blend of herbs brings a delightful depth to the sandwich.
1/2 tsp freshly cracked pepper – For a little extra zing.
How to Make Viral Pickle Sandwich
Follow these simple steps to prepare this delicious Viral Pickle Sandwich:
Step 1: Prepare the Cheese Base
Start by laying shredded cheddar in two rectangles side by side on a parchment paper-lined pan. Mimic the size of a bread slice. Place 3-4 pickle slices side by side on top of the cheese. Sprinkle a little more cheese on top to ensure a gooey sandwich.
Step 2: Bake It Right
Preheat your oven to 400 degrees Fahrenheit (200 degrees Celsius). Bake the cheese and pickle assembly for 20-25 minutes. Here’s where the magic happens! Halfway through the baking, keep an eye on them to make sure the pickles stay in place. They should be golden and crispy around the edges when ready.
Step 3: Prep the Grinder Salad
While the pickles are baking, it’s time to mix up the grinder salad. In a medium bowl, whisk together mayonnaise, red wine vinegar, garlic powder, and Italian seasoning. Toss in the shredded lettuce, red onion, and banana peppers. Give it a good mix until all the veggies are coated with the dressing.
Step 4: Cool the Cheese-Crusted Pickles
When your delicious cheese-pickle creation comes out of the oven, let it cool for about 5 minutes. Patience is a virtue here; the last thing you want is a cheese burn!
Step 5: Broil the Meats (Optional)
If you like your meats warm, broil the layers of genoa salami, pepperoni, and turkey for just 1-2 minutes. This step is optional but gives the meat a delightful warm crust that complements the cold salad perfectly.
Step 6: Assemble Your Masterpiece
Now, it’s assembly time! Place your piled layers of meats on one pickle layer. Add a generous scoop of the grinder salad, followed by slices of fresh tomato. Cap it off with the second pickle layer. Slice through those crispy pickles and voila, your viral pickle sandwich is ready to devour!
For an extra touch, serve with some homemade chips or fresh fruit. Your friends and family will marvel at this unique yet straightforward dish, and you’ll bask in the glory of your culinary triumph! Trust me, this sandwich is a burst of flavor that will have everyone asking for seconds. Enjoy your taste adventure!
This showstopping Viral Pickle Sandwich delivers restaurant-quality results using simple ingredients you probably already have at home. The perfect balance of textures and flavors creates an unforgettable dining experience that will have everyone asking for seconds. Picture-perfect presentation with vibrant colors makes this dish absolutely Instagram-worthy and guaranteed to impress any dinner guest. Incredibly versatile recipe that works beautifully for weeknight dinners, meal prep, special occasions, or even outdoor entertaining sessions.
Perfecting Viral Pickle Sandwich Cooking Process
Start by preparing your baking dish with parchment paper and melting the cheese first. While the cheese is baking, whip up the dressing and toss the veggies. Assemble quickly after the cheese cools for the best texture and flavor.
Add Your Touch to Viral Pickle Sandwich
Feel free to swap out the meats for your personal favorites, such as smoked turkey or ham. Consider adding some spicy jalapeños or avocado for an extra kick. Use different kinds of cheese to experiment with new flavor profiles.
Storing & Reheating Viral Pickle Sandwich
Store leftovers in an airtight container in the fridge for up to two days. To reheat, place the sandwich in a preheated oven for a few minutes until warmed through to maintain its crispy texture.
Chef's Helpful Tips for Viral Pickle Sandwich
- This professional-quality Viral Pickle Sandwich relies on precise timing and temperature control to achieve restaurant-standard results consistently.
- Master the art of mise en place by prepping all ingredients beforehand, ensuring smooth execution and preventing any last-minute cooking disasters.
- The secret lies in layering flavors throughout the cooking process rather than seasoning only at the end for maximum depth.
- Pro tip: let the finished dish rest for optimal texture and flavor development before serving to hungry guests waiting eagerly.
Making this Viral Pickle Sandwich took a little practice, but the smiles on my friends’ faces when I served them crispy, cheesy goodness made every effort worth it.
FAQs About Viral Pickle Sandwich
What is Viral Pickle Sandwich?
The Viral Pickle Sandwich is a creative twist on traditional sandwiches that has taken social media by storm. This dish uses baked cheddar cheese to form crispy layers instead of standard bread, making it gluten-free and customizable. The pickles, layered with meats and a crunchy salad, create a delightful flavor burst. It’s often praised for its unique texture and irresistible taste, making it a standout dish for any meal or gathering.
How do I store leftovers of Viral Pickle Sandwich?
To keep your Viral Pickle Sandwich fresh, store leftovers in an airtight container in the fridge for up to two days. This way, you can enjoy your delicious creation later without losing its unique flavors. When you’re ready to eat, reheat it in a preheated oven for just a few minutes. This ensures the deliciously crispy cheese layer remains crunchy, giving you that same delightful experience as the first bite.
Can I customize the ingredients of Viral Pickle Sandwich?
Absolutely! One of the best parts of the Viral Pickle Sandwich is its versatility. You can swap out meats for your favorites like smoked turkey or ham. Feeling spicy? Add jalapeños or switch out the cheese for something like pepper jack. The options are endless, so feel free to get creative and make this sandwich your own. Your imagination is the limit!
Is the Viral Pickle Sandwich suitable for meal prep?
Yes, the Viral Pickle Sandwich is perfect for meal prep! You can prepare the cheese layers and salad in advance, storing them separately. When you’re ready to enjoy your meal, simply assemble the sandwich and reheat the baked cheese layer briefly in the oven. This not only saves time but also ensures you can enjoy a delicious, satisfying meal throughout the week with minimal effort.
Conclusion for Viral Pickle Sandwich
The Viral Pickle Sandwich combines the crispy goodness of baked cheese with flavorful meats and vibrant veggies, creating a dish that is both fun and delicious. Whether you’re serving it for a casual dinner or a lively gathering, this sandwich is sure to impress. With its customizable nature and easy storage solutions, the Viral Pickle Sandwich is not only a treat for your taste buds but also a practical option for your busy lifestyle. Get ready to indulge!
Viral Pickle Sandwich
Ingredients
Equipment
Method
- Lay shredded cheddar in two rectangles side by side in a parchment paper-lined pan, mimicking the size of a bread slice. Place 3-4 pickle slices side by side on top of the cheese. Sprinkle a little more cheese on top.
- Bake in a preheated oven at 400 degrees for 20-25 minutes. Check on it halfway through to ensure the pickles haven't slid around – if so, gently scoot them back into place. They are done when edges are browned and crispy.
- While they are baking, prep the grinder salad. Mix all the dressing ingredients in a medium bowl. Add in the shredded lettuce, red onion, and banana peppers. Mix well until the veggies are evenly coated.
- Remove the cheese-crusted pickles from the oven and allow them to cool for 5 minutes.
- If desired, lay the layers of meat on a pan and broil for 1-2 minutes to warm through.
- Assemble the sandwich by adding the meats on top of one pickle layer. Then, top with the grinder salad, add slices of tomatoes, and finish with the second pickle layer. Slice and enjoy!