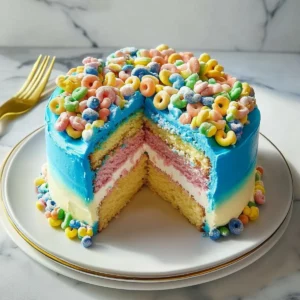
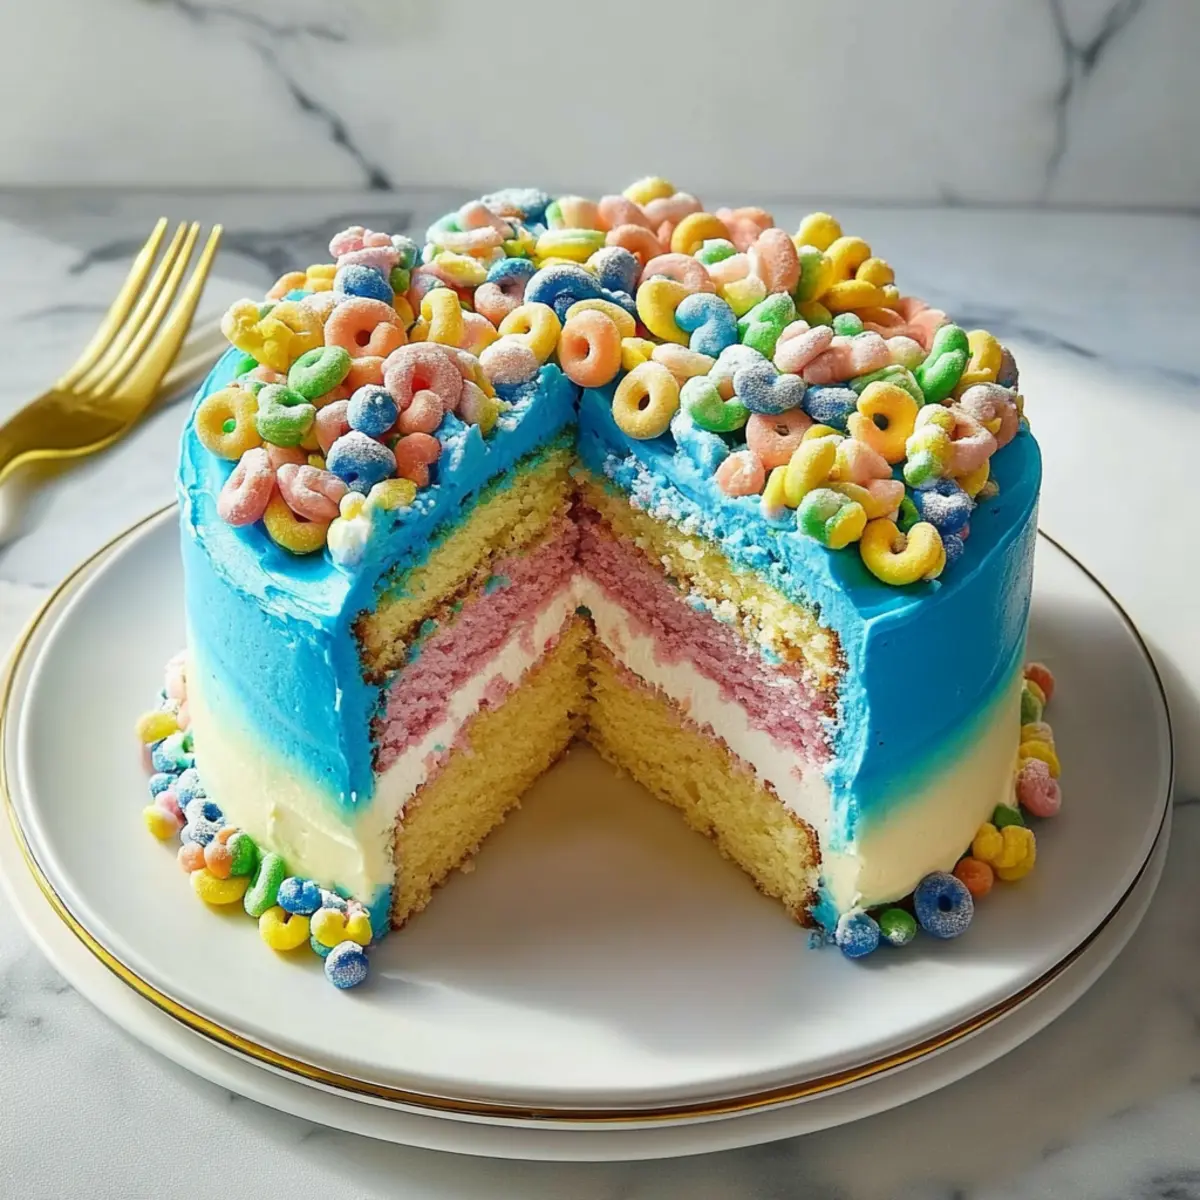
Indulging in a slice of a Lucky Charms No-Bake Rainbow Cake is like taking a bite of pure childhood nostalgia. The vibrant layers burst with color and sweetness, promising a delightful adventure for your taste buds. Each forkful unveils a wonderful medley of fluffiness and crunch, delivering a party of textures that reminds you of sunny days and carefree moments.
Jump to:
- <strong>Ingredients for Lucky Charms No-Bake Rainbow Cake</strong>
- <strong>How to Make Lucky Charms No-Bake Rainbow Cake</strong>
- <strong>Perfecting Lucky Charms No-Bake Rainbow Cake Cooking Process</strong>
- <strong>Add Your Touch to Lucky Charms No-Bake Rainbow Cake</strong>
- <strong>Storing & Reheating Lucky Charms No-Bake Rainbow Cake</strong>
- FAQs About Lucky Charms No-Bake Rainbow Cake
- What is Lucky Charms No-Bake Rainbow Cake?
- How long does it take to make Lucky Charms No-Bake Rainbow Cake?
- Can I customize my Lucky Charms No-Bake Rainbow Cake?
- What should I serve with Lucky Charms No-Bake Rainbow Cake?
- Conclusion for Lucky Charms No-Bake Rainbow Cake
Picture this masterpiece displayed at your next celebration, dazzling guests with its rainbow hues and playful charm. Whether it’s a birthday bash, a family gathering, or a simple Monday night treat, this cake offers both fun and flavor, making it the ultimate showstopper. Get ready for compliments and smiles, as this cake is sure to bring a twinkle to everyone’s eyes!
Why You'll Love This Lucky Charms No-Bake Rainbow Cake
- This incredible Lucky Charms No-Bake Rainbow Cake transforms simple everyday ingredients into restaurant-quality flavors that will blow your mind completely.
- Foolproof recipe techniques guarantee perfect results every single time, making even novice cooks feel like professional chefs instantly.
- Stunning visual appeal with gorgeous colors and mouthwatering aromas creates the ultimate Instagram-worthy dish for any special occasion.
- Endlessly adaptable for different dietary needs while working beautifully for meal prep, date nights, or entertaining large groups effortlessly.
Ingredients for Lucky Charms No-Bake Rainbow Cake
Here’s what you’ll need to make this delicious Lucky Charms No-Bake Rainbow Cake:
2 cups Betty Crocker™ Super Moist™ yellow cake mix – This cake mix provides a soft, buttery base that helps create the perfect texture in your rainbow cake.
Water, vegetable oil, and eggs – These are the standard ingredients called for on the cake mix box, necessary for bringing the cake mix to life.
8 cups Original Lucky Charms™ cereal – The colorful marshmallows add both playful charm and a delightful sweetness that makes this cake exciting for all ages.
1/2 cup white vanilla baking chips – They add a creamy texture and a touch of sweetness that enriches the flavor of the cake layers.
1/2 cup rainbow candy sprinkles – These provide a festive look and cheerful crunch, perfect for topping off your visually appealing cake.
4 1/2 cups Betty Crocker™ Rich & Creamy vanilla frosting – Essential for layering and icing the cake, this frosting ensures every bite is creamy and delicious.
1/4 teaspoon Betty Crocker™ blue gel food color – This vibrant shade helps create the magical rainbow effect for the cake frosting.
How to Make Lucky Charms No-Bake Rainbow Cake
Follow these simple steps to prepare this delicious Lucky Charms No-Bake Rainbow Cake:
Step 1: Prepare Your Cake Layers
Preheat the oven to 350°F (325°F for dark or nonstick pans). Spray the bottoms and sides of two (8-inch) round cake pans with cooking spray to ensure nothing sticks. In a large bowl, mix one box of cake mix along with the required water, vegetable oil, and eggs. Beat with an electric mixer on medium speed for about two minutes, scraping the bowl occasionally. Pour this cake batter evenly into the prepared pans.
Step 2: Bake the Cakes
Place the pans in the oven and bake for 28 to 33 minutes or until a toothpick inserted in the center comes out clean. Once baked, let the cakes cool in the pans for about 10 minutes before carefully removing them to cooling racks. Allow the cakes to cool completely, which should take about one hour. Repeat this process with the second box of cake mix to make two more layers.
Step 3: Prepare the Marshmallow Filling
While the cakes are cooling, line a large rimmed pan with waxed paper. Pour the Lucky Charms™ cereal into the pan and pick out all the marshmallows. Set the marshmallows aside while you reserve the cereal pieces for another tasty treat. Now, flatten the cooled cake layers by trimming off any rounded tops and cut out a small center from two of the layers using a 4-inch round cutter.
Step 4: Assemble the Cake
In a small bowl, combine 1 1/2 cups of the reserved marshmallows, white vanilla baking chips, and 1/3 cup of candy sprinkles. Place one uncut cake layer on a serving plate and spread 1/3 cup of frosting on top. Add the first layer with the center removed, spreading another 1/3 cup of frosting on top, then repeat this with the second layer with the center removed.
Step 5: Fill and Frost the Cake
Fill the center of your layered cake with the marshmallow mixture, gently pressing to level it off. Top this with the remaining uncut cake layer. Apply a crumb coat by frosting the top and sides of the cake with 1 1/2 cups of frosting and refrigerate for about 30 minutes to firm up.
Step 6: Create the Colorful Frosting
In a medium bowl, mix 1 1/2 cups of the frosting with 1/4 teaspoon of blue food color until blended. Set aside 3/4 cup of this blue frosting in a decorating bag fitted with a 1/2-inch star piping tip. Divide the remaining frosting into two small bowls; color one bowl pink with red food coloring and the other bowl yellow with yellow food coloring.
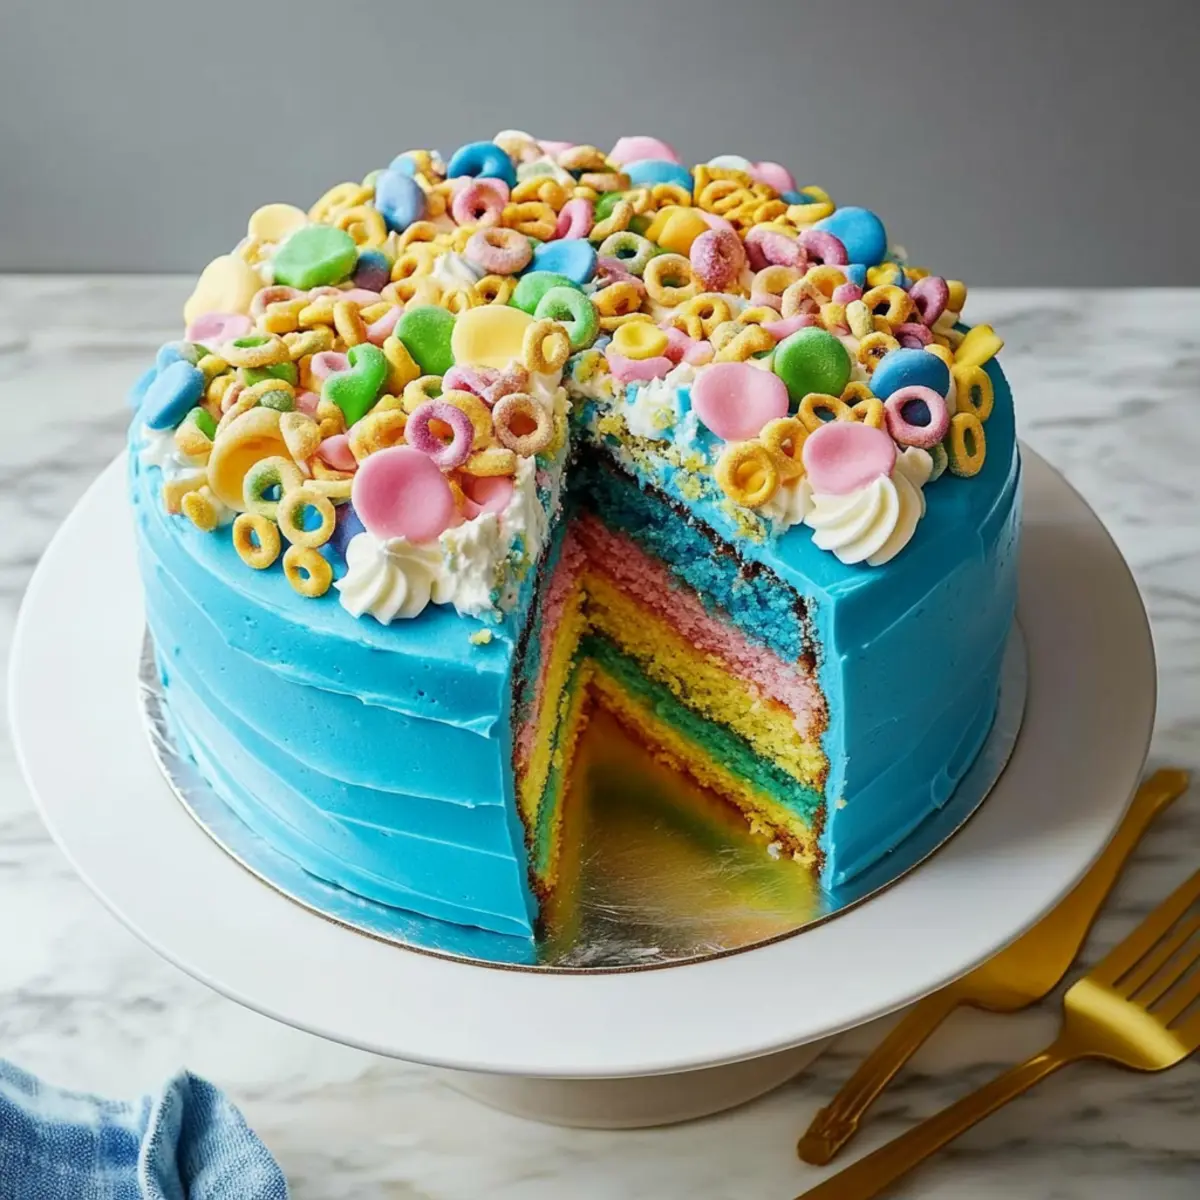
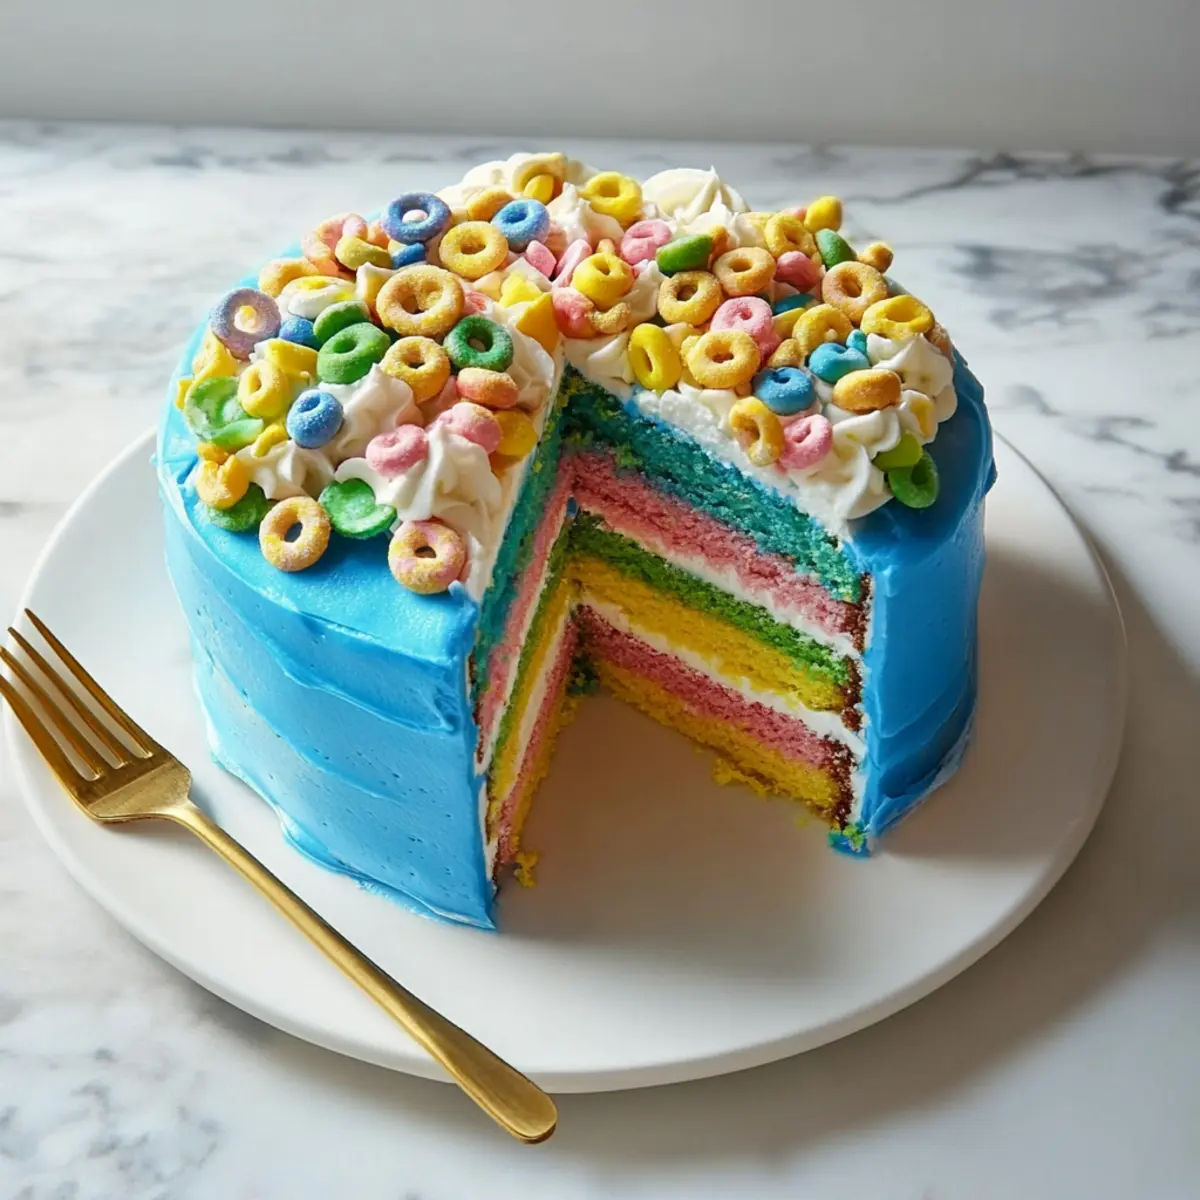
Now, it’s time to transform this cake into a rainbow! Spread 1/2 cup of the blue frosting on the top of the cake, reserving some for the upper third. For the sides, spread pink frosting on the bottom third, yellow frosting in the middle, and finish with the blue frosting on top. Blend the colors together with a spatula for a smooth finish.
Finally, pipe rosettes of frosting around the top edge of the cake. Sprinkle the remaining marshmallows and candy sprinkles over the center for that extra magical touch.
Once done, you can delightfully slice into this colorful creation and watch your guests’ faces light up with joy! Store any leftovers loosely covered at room temperature. Enjoy your cheerful creation!
You Must Know About Lucky Charms No-Bake Rainbow Cake
- This showstopping Lucky Charms No-Bake Rainbow Cake delivers restaurant-quality results using simple ingredients you probably already have at home.
- The perfect balance of textures and flavors creates an unforgettable dining experience that will have everyone asking for seconds.
- Picture-perfect presentation with vibrant colors makes this dish absolutely Instagram-worthy and guaranteed to impress any dinner guest.
- Incredibly versatile recipe that works beautifully for weeknight dinners, meal prep, special occasions, or even outdoor entertaining sessions.
Perfecting Lucky Charms No-Bake Rainbow Cake Cooking Process
To create the most efficient Lucky Charms No-Bake Rainbow Cake, start by prepping all your ingredients before mixing any batter. Assemble the cake layers while waiting for the cake to cool thoroughly, which allows you to keep the fun moving at a steady pace.
Add Your Touch to Lucky Charms No-Bake Rainbow Cake
Feel free to customize your Lucky Charms No-Bake Rainbow Cake with different cereals, such as Fruity Pebbles for a tropical twist or Cocoa Puffs for a chocolatey delight. You can also swap the vanilla frosting for chocolate to kick things up a notch!
Storing & Reheating Lucky Charms No-Bake Rainbow Cake
To store your Lucky Charms No-Bake Rainbow Cake, cover it lightly with plastic wrap or foil and keep it at room temperature for up to three days. If you have leftovers, they fit perfectly in the refrigerator; just be sure to serve cold for the best taste.
Chef's Helpful Tips for Lucky Charms No-Bake Rainbow Cake
- This professional-quality Lucky Charms No-Bake Rainbow Cake relies on precise timing and temperature control to achieve restaurant-standard results consistently.
- Master the art of mise en place by prepping all ingredients beforehand, ensuring smooth execution and preventing any last-minute cooking disasters.
- The secret lies in layering flavors throughout the cooking process rather than seasoning only at the end for maximum depth.
- Pro tip: let the finished dish rest for optimal texture and flavor development before serving to hungry guests waiting eagerly.
Making my famous Lucky Charms No-Bake Rainbow Cake for my niece’s birthday was a hit! Her friends couldn’t get enough, proving that colorful desserts really can bring joy.
FAQs About Lucky Charms No-Bake Rainbow Cake
What is Lucky Charms No-Bake Rainbow Cake?
Lucky Charms No-Bake Rainbow Cake is a delightful dessert that combines the whimsical colors and flavors of iconic Lucky Charms cereal with layers of creamy frosting and sweet marshmallows. This eye-catching cake is perfect for parties, birthdays, or any festive occasion. Rather than baking, this dessert relies on assembling colorful layers that create a stunning visual display. Easy to make and no oven required, it’s as fun to prepare as it is to eat!
How long does it take to make Lucky Charms No-Bake Rainbow Cake?
While the actual assembly of the Lucky Charms No-Bake Rainbow Cake is quick, the total time can vary. Typically, you will spend around 30 to 40 minutes preparing and assembling the cake. Additionally, you should allow the cake to rest in the refrigerator for at least 30 minutes to set properly. If you’re using store-bought frosting and pre-prepared ingredients, your prep time could significantly reduce!
Can I customize my Lucky Charms No-Bake Rainbow Cake?
Absolutely! One of the best features of the Lucky Charms No-Bake Rainbow Cake is its versatility. You can experiment with different cereals for varying textures and flavors. Consider using Fruity Pebbles for a tropical twist or even a chocolate frosting to switch things up. Also, you can add seasonal sprinkles or even fruits between layers for additional flavor and color.
What should I serve with Lucky Charms No-Bake Rainbow Cake?
The vibrant colors of Lucky Charms No-Bake Rainbow Cake shine on their own, but pairing it with a scoop of vanilla ice cream or whipped cream can elevate the experience. For an extra special touch, drizzle some chocolate or caramel sauce over each slice to add richness. Fresh fruit, like strawberries or raspberries, can simplify the dessert’s sweetness while adding a lovely color contrast!
Conclusion for Lucky Charms No-Bake Rainbow Cake
To sum it up, the Lucky Charms No-Bake Rainbow Cake is a joyous and accessible dessert option that combines fun flavors, vibrant colors, and simple preparation. Perfect for any celebration or just a delightful treat at home, it brings a smile to everyone’s faces. With its eye-catching layers and delightful taste, this cake is a magical addition to your dessert repertoire! Don’t miss trying this enchanting cake for your next gathering.
Lucky Charms No-Bake Rainbow Cake
Ingredients
Equipment
Method
- Heat oven to 350°F (325°F for dark or nonstick pans). Spray bottoms and sides of 2 (8-inch) round cake pans with cooking spray.
- In a large bowl, beat 1 box cake mix and ingredients called for on box with electric mixer on medium speed for 2 minutes, scraping bowl occasionally. Divide evenly between pans.
- Bake for 28 to 33 minutes or until a toothpick inserted in the center comes out clean. Cool for 10 minutes; remove from pans to cooling racks. Cool completely, about 1 hour. Meanwhile, repeat mixing and baking with the second box of cake mix to make 2 more layers.
- Line a large rimmed pan with waxed paper. Pour Lucky Charms™ cereal into the pan. Pick out all the marshmallows; set aside. Reserve cereal pieces for another use.
- Flatten cake layers by trimming off round tops. In 2 layers, cut a small round out of the center using a 4-inch round cutter. In a small bowl, mix 1 1/2 cups of the marshmallows, the white vanilla baking chips, and 1/3 cup of the candy sprinkles; set aside.
- To assemble the cake: Place 1 uncut cake layer on a serving plate; spread 1/3 cup frosting on top. Top with 1 layer with center removed; spread 1/3 cup frosting on top. Top with the second layer with center removed; spread 1/3 cup frosting on top.
- Fill the cake with the marshmallow mixture. Gently press to level; top with the full cake layer. Frost the top and side of the cake with 1 1/2 cups frosting to form a crumb coat. Refrigerate for 30 minutes.
- In a medium bowl, place 1 1/2 cups of the frosting; stir in 1/4 teaspoon blue food color until blended. Fit a decorating bag with a 1/2-inch star piping tip; fill with 3/4 cup frosting. Set decorating bag and frosting aside.
- In 2 small bowls, place 1/4 cup each of frosting. To 1 bowl, add red food color to desired pink color; to the other bowl, add yellow food color to desired color.
- Spread 1/2 cup of the blue frosting on top of the cake, reserving remaining frosting for the top third of the cake. Starting on the side, spread pink frosting on the bottom third of the cake. In the middle third of the cake, spread yellow frosting so yellow frosting overlaps pink frosting. On the upper third of the cake, spread remaining blue frosting so blue frosting overlaps yellow frosting.
- Using an icing spatula, smooth the sides of the cake to blend colors. Wipe spatula clean with a paper towel as needed. Repeat blending of frosting and wiping off spatula. Smooth the top if needed. Pipe frosting rosettes around the top edge of the cake. Sprinkle remaining marshmallows and candy sprinkles in center.