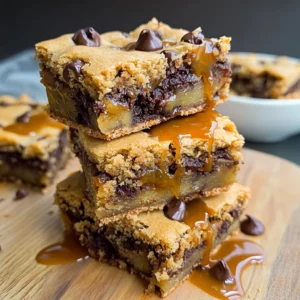
There is something undeniably magical about baking, especially when it comes to Red Velvet Crinkle Cookies. Imagine the joy of peeling open a package and discovering the striking red color, its soft, crinkly surface hinting at the rich cocoa and butter hidden within. These cookies don?t just taste divine; they transform any moment into a special occasion, be it a cozy night in or a festive gathering.

Jump to:
- <strong>Ingredients for Red Velvet Crinkle Cookies</strong>
- <strong>How to Make Red Velvet Crinkle Cookies</strong>
- <strong>Perfecting Red Velvet Crinkle Cookies Cooking Process</strong>
- <strong>Add Your Touch to Red Velvet Crinkle Cookies</strong>
- <strong>Storing & Reheating Red Velvet Crinkle Cookies</strong>
- FAQs About Red Velvet Crinkle Cookies
- What are Red Velvet Crinkle Cookies?
- How do I store Red Velvet Crinkle Cookies?
- Can I customize my Red Velvet Crinkle Cookies?
- What makes Red Velvet Crinkle Cookies different from regular chocolate cookies?
- Conclusion for Red Velvet Crinkle Cookies
Every bite of these Red Velvet Crinkle Cookies fills your mouth with a creamy sweetness, while their vibrant hue adds a pop of joy to your dessert table. Whenever I bake these cookies, I?m reminded of the laughter-filled holidays in my grandmother?s kitchen, where flour flew and the smell of chocolate mingled with love. These delightful pockets of cheer are perfect for sharing, whether it’s a birthday bash or a simple Sunday family dinner.
Why You'll Love This Red Velvet Crinkle Cookies
- This incredible Red Velvet Crinkle Cookies transforms simple everyday ingredients into restaurant-quality flavors that will blow your mind completely.
- Foolproof recipe techniques guarantee perfect results every single time, making even novice cooks feel like professional chefs instantly.
- Stunning visual appeal with gorgeous colors and mouthwatering aromas creates the ultimate Instagram-worthy dish for any special occasion.
- Endlessly adaptable for different dietary needs while working beautifully for meal prep, date nights, or entertaining large groups effortlessly.
Ingredients for Red Velvet Crinkle Cookies
Here’s what you’ll need to make this delicious Red Velvet Crinkle Cookies:
1/2 cup unsalted butter ? Make sure it?s softened for easy creaming with the sugars.
3/4 cup light brown sugar ? Packed tightly to add a lovely molasses flavor.
1/2 cup granulated sugar ? Balances the richness of the brown sugar.
2 large eggs ? Bring to room temperature for easier mixing.
2 teaspoons vanilla extract ? Adds a delightful aroma and flavor depth.
1/2 teaspoon professional red food coloring ? For that iconic vibrant color; a little goes a long way.
2 cups all-purpose flour ? The base of our cookies, providing structure.
1/3 cup cocoa powder ? Use unsweetened for a rich chocolate flavor.
1 1/2 teaspoons baking powder ? This helps the cookies rise beautifully.
1/2 teaspoon salt ? Enhances the sweetness and balances flavors.
1/2 cup granulated sugar (for coating) ? This sugar adds sweetness and a crisp outer shell.
1/2 cup powdered sugar (for coating) ? Creates a snowy finish that looks scrumptious.
How to Make Red Velvet Crinkle Cookies
Follow these simple steps to prepare this delicious Red Velvet Crinkle Cookies:
Step 1: Preheat and Prepare
Preheat your oven to 350?F (175?C) and line a baking sheet with parchment paper. This prevents the cookies from sticking and makes cleanup a breeze!
Step 2: Creaming the Butters and Sugars
In a large bowl, cream the softened unsalted butter, light brown sugar, and granulated sugar together until the mixture is light and fluffy. This usually takes about 3-4 minutes, so don?t rush ? it?s worth the wait! Scrape down the sides of the bowl to ensure everything is well combined.
Step 3: Mix in the Wet Ingredients
Add the eggs one at a time, mixing well between each addition. Stir in the vanilla extract and professional red food coloring until the mixture is uniform. This is where the magic of color begins!
Step 4: Combine Dry Ingredients
In a separate bowl, sift together the all-purpose flour, cocoa powder, baking powder, and salt. Sifting ensures a lighter cookie, as it breaks up any clumps. Slowly add this dry mixture to the wet ingredients, beating until just combined. Be careful not to overmix!
Step 5: Shape the Cookie Dough
Scoop out the cookie dough using a 1-ounce cookie scoop or a tablespoon. Roll the balls first in granulated sugar, and then in powdered sugar to completely coat them. This double-coating creates that stunning crinkle appearance when baked. Space them about an inch apart on the prepared baking sheet.
Step 6: Bake to Perfection
Bake for about 10 minutes. The cookies should puff up, showing delightful cracks on top, but remain slightly gooey in the center. Remove them from the oven, let them cool slightly on the baking sheet, and then transfer them to a wire rack.
These Red Velvet Crinkle Cookies are not just a treat; they are a celebration in every bite. Imagine their inviting aroma wafting through your home as you share them with friends and family. Perfect for any occasion, these cookies will light up your dessert table and your taste buds! Enjoy indulging in these soft, sweet morsels while reminiscing about memories made in the kitchen.
You Must Know About Red Velvet Crinkle Cookies
- This showstopping Red Velvet Crinkle Cookies delivers restaurant-quality results using simple ingredients you probably already have at home.
- The perfect balance of textures and flavors creates an unforgettable dining experience that will have everyone asking for seconds.
- Picture-perfect presentation with vibrant colors makes this dish absolutely Instagram-worthy and guaranteed to impress any dinner guest.
- Incredibly versatile recipe that works beautifully for weeknight dinners, meal prep, special occasions, or even outdoor entertaining sessions.
Perfecting Red Velvet Crinkle Cookies Cooking Process
To create these luscious Red Velvet Crinkle Cookies, start by preheating your oven while you cream together the butter and sugars. This technique ensures that everything comes together beautifully and saves you time. Follow the sequence: mix wet ingredients, combine dry, and then meld them into a delicious dough without wasting precious moments.
Add Your Touch to Red Velvet Crinkle Cookies
Feel free to jazz up your Red Velvet Crinkle Cookies! Try swapping in white chocolate chips or adding crushed nuts for a delightful crunch. You could also experiment with different food colorings to enhance that vibrant red hue or play with various flavored extracts for a unique spin.
Storing & Reheating Red Velvet Crinkle Cookies
To keep your Red Velvet Crinkle Cookies fresh, store them in an airtight container at room temperature for up to a week. For longer storage, freeze them between layers of parchment paper. When ready to enjoy, simply thaw at room temperature or pop in the microwave for a few seconds.
Chef's Helpful Tips for Red Velvet Crinkle Cookies
- This professional-quality Red Velvet Crinkle Cookies relies on precise timing and temperature control to achieve restaurant-standard results consistently.
- Master the art of mise en place by prepping all ingredients beforehand, ensuring smooth execution and preventing any last-minute cooking disasters.
- The secret lies in layering flavors throughout the cooking process rather than seasoning only at the end for maximum depth.
- Pro tip: let the finished dish rest for optimal texture and flavor development before serving to hungry guests waiting eagerly.
When I first whipped up a batch of Red Velvet Crinkle Cookies for a gathering, my friends devoured them so quickly that they nearly forgot to compliment my cooking! The smiles on their faces and the crumbs on their shirts were testament enough that this recipe was a hit.
FAQs About Red Velvet Crinkle Cookies
What are Red Velvet Crinkle Cookies?
Red Velvet Crinkle Cookies are a delightful twist on the classic red velvet cake, transforming it into a soft, chewy cookie with that iconic red color. These cookies are a vibrant treat, featuring the rich flavor of cocoa and the sweet hints of vanilla combined with that signature tangy cream cheese essence. Their textured exterior, coated in powdered sugar, creates a stunning appearance while offering a burst of flavor with every bite. Perfect for parties or a cozy evening treat, these cookies are sure to impress.
How do I store Red Velvet Crinkle Cookies?
To keep your Red Velvet Crinkle Cookies fresh, store them in an airtight container at room temperature. They will maintain their delectable taste for up to a week. If you?d like to enjoy them later, you can freeze these cookies between layers of parchment paper for up to three months. When you’re ready to indulge, simply let them thaw at room temperature or pop them in the microwave for a few seconds for a warm, gooey treat.
Can I customize my Red Velvet Crinkle Cookies?
Absolutely! There are plenty of ways to customize your Red Velvet Crinkle Cookies to suit your taste. You can mix in white chocolate chips for a creamy contrast or add crushed nuts for a delightful crunch. If you’re feeling adventurous, try experimenting with different food coloring to enhance that vibrant hue or swap vanilla extract for almond or peppermint for a unique twist. The possibilities are endless, making this recipe a canvas for your creativity.
What makes Red Velvet Crinkle Cookies different from regular chocolate cookies?
The primary difference lies in the flavor and appearance. Red Velvet Crinkle Cookies boast a deep red color, achieved through the use of coloring combined with cocoa powder, which gives them a unique taste profile. They often feature a rich buttery flavor paired with the slight tang of buttermilk, setting them apart from standard chocolate cookies. Additionally, their signature crackled surface, thanks to the sugar coatings, adds an appealing texture and visual allure that classic cookies typically lack.
Conclusion for Red Velvet Crinkle Cookies
In summary, the delightful Red Velvet Crinkle Cookies bring a perfect touch of whimsy and flavor to any gathering. With their easy preparation and thrilling taste, these cookies are both impressive and enjoyable. Whether for a special occasion or just a sweet treat to brighten your day, this recipe transforms simple ingredients into a vibrant dessert. Enjoy every bite of your Red Velvet Crinkle Cookies and watch them disappear from the plate in no time!
Red Velvet Crinkle Cookies
Ingredients
Equipment
Method
- Preheat the oven to 350?F and line a baking sheet with parchment paper. Set aside.
- Cream the butter, brown sugar, and granulated sugar together in a large bowl until light and fluffy.
- Scrape down the bowl and add the eggs one at a time, beating between each addition. Add the vanilla and red food coloring, and mix well.
- In a separate bowl, sift together the flour, cocoa powder, baking powder, and salt to combine. Add the dry ingredients to the wet and beat together until combined.
- Fill one bowl with granulated sugar and one bowl with powdered sugar. Use a 1 ounce cookie scoop (or tablespoon) to scoop cookies out.
- Roll the balls first in the granulated sugar and then in the powdered sugar to completely coat the cookie balls. Place on the prepared cookie sheet an inch apart.
- Bake for 10 minutes or until the cookies have puffed up and cracked, but are still a little gooey in the center.
- Allow to cool and enjoy.