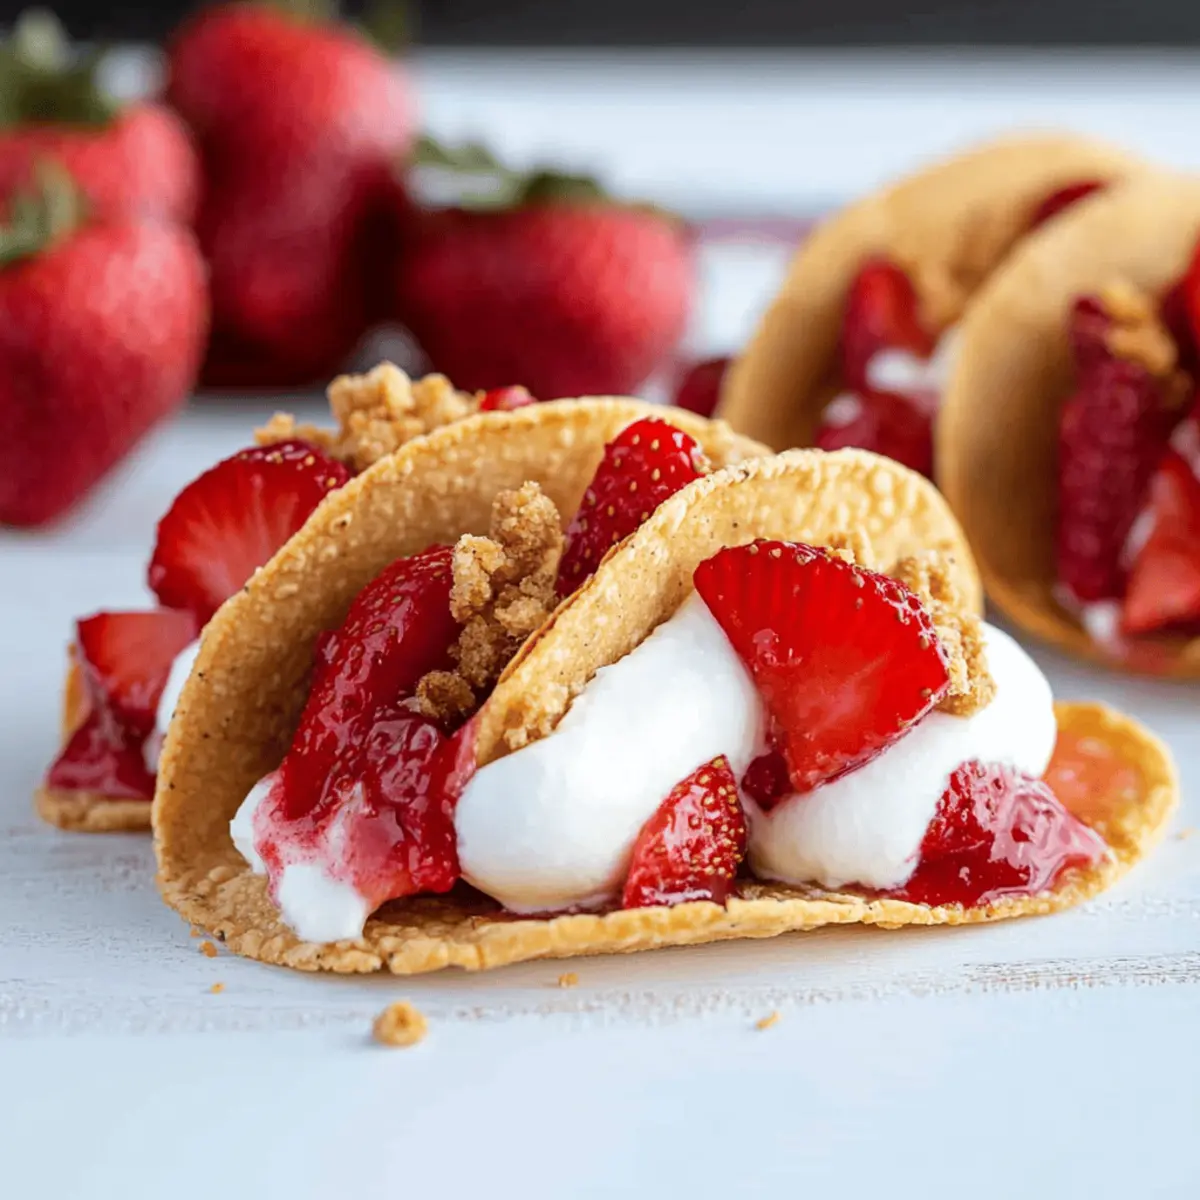
Strawberry Crunch Cheesecake Tacos combine the classic dessert flavors of cheesecake with the playful, fun aspect of taco shells. Picture biting into a crunchy shell stuffed with creamy cheesecake, bursting with fresh strawberry flavor that dances on your taste buds. It’s a delightful twist that makes dessert feel like a party, whether it?s a casual family dinner or a festive gathering with friends.
Jump to:
- <strong>Ingredients for Strawberry Crunch Cheesecake Tacos</strong>
- <strong>How to Make Strawberry Crunch Cheesecake Tacos</strong>
- <strong>Perfecting Strawberry Crunch Cheesecake Tacos Cooking Process</strong>
- <strong>Add Your Touch to Strawberry Crunch Cheesecake Tacos</strong>
- <strong>Storing & Reheating Strawberry Crunch Cheesecake Tacos</strong>
- FAQs About Strawberry Crunch Cheesecake Tacos
- What is Strawberry Crunch Cheesecake Tacos?
- How do I make the cheesecake filling for Strawberry Crunch Cheesecake Tacos?
- Can I customize my Strawberry Crunch Cheesecake Tacos?
- How should I store leftover Strawberry Crunch Cheesecake Tacos?
- Conclusion for Strawberry Crunch Cheesecake Tacos
This is not just a recipe; it’s a memorable experience that takes you straight back to summer picnics, where desserts are always a highlight. The vibrant colors and luscious flavor of these Strawberry Crunch Cheesecake Tacos will have everyone at the table clamoring for more. You won?t believe how easy it is to whip these delicious treats up, bringing a smile to your face and satisfaction to your palate.
Why You'll Love This Strawberry Crunch Cheesecake Tacos
- These amazing Strawberry Crunch Cheesecake Tacos offer more than just flavor; they make meal prep a breeze.
- You can easily customize the ingredients based on what you have on hand.
- The vibrant colors and aromas make it visually stunning on any dinner table.
- Perfect for grilling but versatile enough for baking or pan-searing.
Ingredients for Strawberry Crunch Cheesecake Tacos
Here’s what you’ll need to make this delicious Strawberry Crunch Cheesecake Tacos:
7 9-inch tortilla shells ? These serve as the fun, crunchy ?taco? shells that perfectly hold your cheesecake filling.
1 cup graham cracker crumbs ? This gives the shells the signature cheesecake flavor, adding a delicious crunch when baked.
1 1/2 tablespoons granulated sugar ? A little sugar enhances the sweetness of the graham crackers and balances out the tartness of the strawberries.
1/3 cup butter, melted ? The butter helps to bind the graham cracker crumbs and gives the shells a nice golden color when baked.
8 ounces cream cheese, room temperature ? The star of the filling; ensure it’s soft to blend smoothly into a creamy mix.
3 tablespoons cheesecake instant pudding mix ? This helps the filling achieve that fluffy, cheesecake-like texture without needing to bake.
1 cup heavy whipping cream ? Adds richness and creates a light, airy texture when whipped.
1/2 cup powdered sugar ? This sweetens the filling and enhances its creaminess.
1 teaspoon vanilla extract ? It brings warmth and depth to the cheesecake flavor; use pure vanilla for the best taste.
1/2 cup chopped strawberries ? Fresh strawberries add juiciness and enhance the dessert’s fruity flavor.
3/4 cup strawberry glaze ? Drizzle over the tops for that signature sweetness and to make your tacos visually stunning.
How to Make Strawberry Crunch Cheesecake Tacos
Follow these simple steps to prepare this delicious Strawberry Crunch Cheesecake Tacos:
Step 1: Preheat the Oven
Begin by preheating your oven to 400?F (200?C). This will ensure that the taco shells bake evenly and get that nice, crispy texture.
Step 2: Prepare the Shells
In a shallow dish, mix together the graham cracker crumbs and sugar using a fork. This combo will coat your taco shells in the sweetest crunch.
Step 3: Cut and Prepare the Tortillas
Using a 3 3/4-inch circle cookie cutter, cut out three circles from each 9-inch tortilla shell. Poke the circles with a fork 6 to 7 times on both sides to prevent air bubbles.
Step 4: Assemble the Shells
Brush each tortilla circle with melted butter, then coat them in the graham cracker mixture. Fold each circle into a taco shape and place them upside down into the cups of an inverted cupcake pan. Stagger them slightly for even cooking.
Step 5: Bake the Taco Shells
Bake the shells in the preheated oven for about 11 minutes or until the edges are brown and stiff. Allow them to cool in the pans to keep their shape.
Step 6: Make the Cheesecake Filling
In a large mixing bowl, beat the room-temperature cream cheese until it?s smooth and creamy. Then add the pudding mix, 1/2 cup of heavy cream, powdered sugar, and vanilla extract. Beat until everything is perfectly blended. Slowly add the remaining heavy cream and whip until it becomes fluffy.
Step 7: Fill the Shells
Grab a piping bag fitted with a Wilton 1M piping tip and fill it with the cheesecake mixture. Pipe the filling into the cooled taco shells, starting from the center and moving toward the edges for a lovely presentation.
Step 8: Prepare the Topping
In a separate bowl, mix the chopped strawberries with the strawberry glaze until they?re well coated. Spoon this delicious topping onto each cheesecake taco.
Now that your Strawberry Crunch Cheesecake Tacos are prepped, serve them immediately. These delightful bite-sized treats will be the star of your dessert table, guaranteed to make everyone smile! With layers of flavor and texture, each bite will have you wanting more. Enjoy your sweet adventure!
You Must Know About Strawberry Crunch Cheesecake Tacos
- This amazing Strawberry Crunch Cheesecake Tacos offers more than just flavor; it makes meal prep a breeze.
- You can easily customize the ingredients based on what you have on hand.
- The vibrant colors and aromas make it visually stunning on any dinner table.
- Perfect for grilling but versatile enough for baking or pan-searing.
Perfecting Strawberry Crunch Cheesecake Tacos Cooking Process
To whip up the best Strawberry Crunch Cheesecake Tacos, start by preparing your taco shells. While they cool, focus on mixing the cheesecake filling for smooth consistency and flavor. Then, prepare your strawberry topping while the filling chills for a harmonious blend of flavors.
Add Your Touch to Strawberry Crunch Cheesecake Tacos
Feel free to swap out the strawberries with your favorite fruits like blueberries or raspberries. Add a splash of lemon or orange zest to the cheesecake for a zesty twist. You could even incorporate a layer of chocolate ganache for a decadent layer of flavor.
Storing & Reheating Strawberry Crunch Cheesecake Tacos
To maintain the quality of your Strawberry Crunch Cheesecake Tacos, store leftovers in an airtight container in the refrigerator for up to 3 days. For best results, enjoy them cold. If reheating is essential, warm the taco shells slightly in the oven before serving.
Chef's Helpful Tips for Strawberry Crunch Cheesecake Tacos
- This amazing Strawberry Crunch Cheesecake Tacos offers more than just flavor; it makes meal prep a breeze.
- You can easily customize the ingredients based on what you have on hand.
- The vibrant colors and aromas make it visually stunning on any dinner table.
- Perfect for grilling but versatile enough for baking or pan-searing.
The first time I made these Strawberry Crunch Cheesecake Tacos, my friends couldn’t get enough. Their joyful faces and compliments made me realize I was on to something special!
FAQs About Strawberry Crunch Cheesecake Tacos
What is Strawberry Crunch Cheesecake Tacos?
Strawberry Crunch Cheesecake Tacos are a delightful twist on traditional tacos, featuring a crunchy graham cracker crust shaped into taco shells filled with creamy cheesecake. These portable desserts boast a sweet filling made from cream cheese, whipped cream, and cheesecake pudding, all topped with fresh strawberries and a rich strawberry glaze. They are perfect for parties and potlucks, offering a playful yet elegant dessert option that will impress your guests.
How do I make the cheesecake filling for Strawberry Crunch Cheesecake Tacos?
To create the cheesecake filling for Strawberry Crunch Cheesecake Tacos, start by beating cream cheese until it becomes smooth and creamy. Then, mix in instant cheesecake pudding, heavy cream, powdered sugar, and vanilla extract. Once these ingredients blend seamlessly, continue to add the remaining heavy cream and whip until your filling reaches a fluffy consistency. This rich filling pairs perfectly with the crunchy taco shells and fresh fruit topping.
Can I customize my Strawberry Crunch Cheesecake Tacos?
Absolutely! One of the best aspects of Strawberry Crunch Cheesecake Tacos is their flexibility. You can substitute strawberries with other fresh fruits like blueberries, raspberries, or even mangoes for a tropical twist. Additionally, consider adding citrus zest or a splash of lemon juice to brighten the cheesecake filling. If you’re feeling indulgent, add a layer of chocolate ganache for an extra decadent treat that caters to every sweet tooth.
How should I store leftover Strawberry Crunch Cheesecake Tacos?
To keep your Strawberry Crunch Cheesecake Tacos fresh, store any leftovers in an airtight container in the refrigerator for up to three days. It’s best to enjoy them cold, as this maintains their delightful texture. If you prefer them slightly warm, gently reheat the taco shells in the oven for a few minutes before serving. This will help revive their crunchiness while ensuring the cheesecake filling remains cool and creamy.
Conclusion for Strawberry Crunch Cheesecake Tacos
In summary, Strawberry Crunch Cheesecake Tacos offer an innovative and delicious twist on conventional desserts, combining the delightful flavors of cheesecake with the fun of tacos. With an easy-to-follow recipe and limitless customization options, these delightful treats are perfect for a range of occasions. Remember, the key to the perfect Strawberry Crunch Cheesecake Tacos lies in balancing the rich filling, crunchy shells, and fresh fruit toppings to create a dessert everyone will love. Enjoy making and sharing these scrumptious delights!
Delicious Strawberry Crunch Cheesecake Tacos Recipe to Make Today
Ingredients
Equipment
Method
- Preheat the oven to 400 degrees F.
- Add graham cracker crumbs and sugar to a shallow dish and stir to combine.
- Using a 3 3/4 inch circle cookie cutter, cut out 3 circles per 9-inch tortilla shell.
- Using a fork, stab each circle 6 to 7 times on both sides to prevent air bubbles.
- Brush each shell with melted butter.
- Press each shell into the shallow dish of graham cracker crumbs, coating both sides.
- Fold each shell in half to form a seam and flip a cupcake pan upside down.
- Stagger the shells between the cups of the cupcake pan.
- Bake in the preheated oven for 11 minutes until the edges are brown and stiff.
- Remove from oven and cool in the cupcake pans to retain shape.
- In a large mixing bowl, beat cream cheese until smooth and creamy using a hand mixer.
- Add pudding mix, 1/2 cup of heavy cream, powdered sugar, and vanilla extract; beat until incorporated.
- Add remaining heavy cream and beat until smooth and fluffy.
- Fill a piping bag fitted with a Wilton 1M piping tip with the cheesecake filling.
- Pipe the cheesecake filling into the cooled taco shells, starting from the center and moving to the edges.
- In a bowl, stir together chopped strawberries and strawberry glaze.
- Spoon the topping onto the cheesecake tacos.
- Serve immediately.