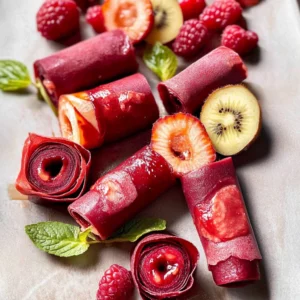
Imagine sinking your teeth into a chewy, fruity delight that bursts with vibrant flavors and tantalizing aromas. Healthy Fruit Roll-Ups are not just snacks; they’re little bundles of joy crafted from pureed fruit, perfect for satisfying sweet cravings while keeping things nutritious.

Jump to:
I still remember the first time I unwrapped one of these delightful treats during a sunny picnic with friends, laughter filling the air as we savored each bite. Whether it’s a midday pick-me-up or a fun addition to lunchboxes, these roll-ups promise an explosion of natural sweetness that will have everyone asking for seconds!
Why Is Healthy Fruit Roll-Ups So Irresistibly Good?
Fresh fruit shines in this recipe, offering a burst of natural sweetness without any added preservatives. Simple prep means you can whip these up in just 15 minutes, letting them dry while you focus on other tasks. Customizable flavors allow you to mix and match fruits like strawberries, mangoes, or apples for endless variety. Kid-friendly and nutritious, they’re perfect for lunchboxes or after-school snacks. Plus, the use of honey or maple syrup lets you adjust sweetness to your taste!
Healthy Fruit Roll-Ups Ingredient List
- 2 cups fresh fruit (e.g., strawberries, mangoes, or apples) – Choose ripe fruit for best flavor and natural sweetness to make your Healthy Fruit Roll-Ups delightful.
- 1 tablespoon honey or maple syrup (Optional) – Adjust based on fruit sweetness; this adds a touch of natural sweetness if your fruit isn’t quite ripe.
- 1 tablespoon lemon juice – This enhances flavor and preserves color, keeping your roll-ups vibrant and fresh-looking.
How to Make Healthy Fruit Roll-Ups
1. Preheat the oven to 170°F (75°C).
Get your oven ready for a long, low bake that will transform fresh fruit into delicious, chewy snacks.
2. Wash and chop the fruit into smaller pieces.
Use about 2 cups of ripe fruit, like strawberries, mangoes, or apples, ensuring they’re clean and easy to blend.
3. Blend the fruit, honey (if using), and lemon juice in a blender until smooth.
Combine the fruit with 1 tablespoon of honey or maple syrup (optional) and 1 tablespoon of lemon juice for a vibrant puree.
4. Line a baking sheet with parchment paper.
This will help prevent sticking and make it easier to peel off the finished fruit leather later on.
5. Pour the fruit puree onto the parchment paper and spread it evenly with a spatula.
Aim for a thickness of about 1/8 inch; this ensures even drying throughout the baking process.
6. Bake in the preheated oven for about 4-6 hours, or until the fruit leather is no longer sticky.
You’ll know it’s done when it feels tacky but not wet; check periodically to avoid over-drying.
7. Once cooled, peel the fruit leather off the parchment paper.
Allow it to cool completely for easier handling as you prepare to cut it into strips.
8. Cut into strips and roll them up. Store in an airtight container.
This is where you can get creative! Roll them tightly for easy snacking later on.
Optional: Enjoy with a sprinkle of coconut flakes for an extra tropical twist!
Exact quantities are listed in the recipe card below.
Expert Tips
- Fruit Selection: Use ripe, in-season fruit for maximum flavor. Overripe fruit can lead to a soggy texture in your Healthy Fruit Roll-Ups.
- Sweetness Adjustment: Taste your fruit puree before adding honey or maple syrup. If the fruit is sweet enough, skip the added sugars.
- Consistent Thickness: Spread the fruit puree evenly on the baking sheet. Inconsistent thickness can cause uneven drying, leaving some parts sticky.
- Oven Monitoring: Keep an eye on the roll-ups as they bake. Different fruits may require slightly different baking times; check for doneness around 4 hours.
- Cooling Time: Allow the fruit leather to cool completely before peeling it off the parchment paper to prevent tearing.
- Storage Tips: Store cut strips in an airtight container to maintain freshness. Keep them at room temperature or refrigerate for longer shelf life.
How to Store and Freeze Healthy Fruit Roll-Ups
Room Temperature: Store your Healthy Fruit Roll-Ups in an airtight container for up to 2 days. Keep them away from direct sunlight to maintain freshness.
Fridge: For longer storage, refrigerate the roll-ups in an airtight container for up to 1 week. This helps preserve their flavor and texture without drying out.
Freezer: Freeze rolled-up snacks by placing parchment paper between layers in an airtight freezer bag. They can last for up to 3 months, perfect for quick snacks!
Thawing: To enjoy frozen Healthy Fruit Roll-Ups, simply take them out of the freezer and let them thaw at room temperature for about 30 minutes before serving.
Healthy Fruit Roll-Ups Your Way
Unleash your creativity in the kitchen by customizing these fruity snacks to suit your taste buds!
- Tropical Twist: Substitute mangoes or add pineapple for a refreshing, island-inspired flavor. The combination brings an exotic sweetness that dances on your palate, making every bite a mini-vacation.
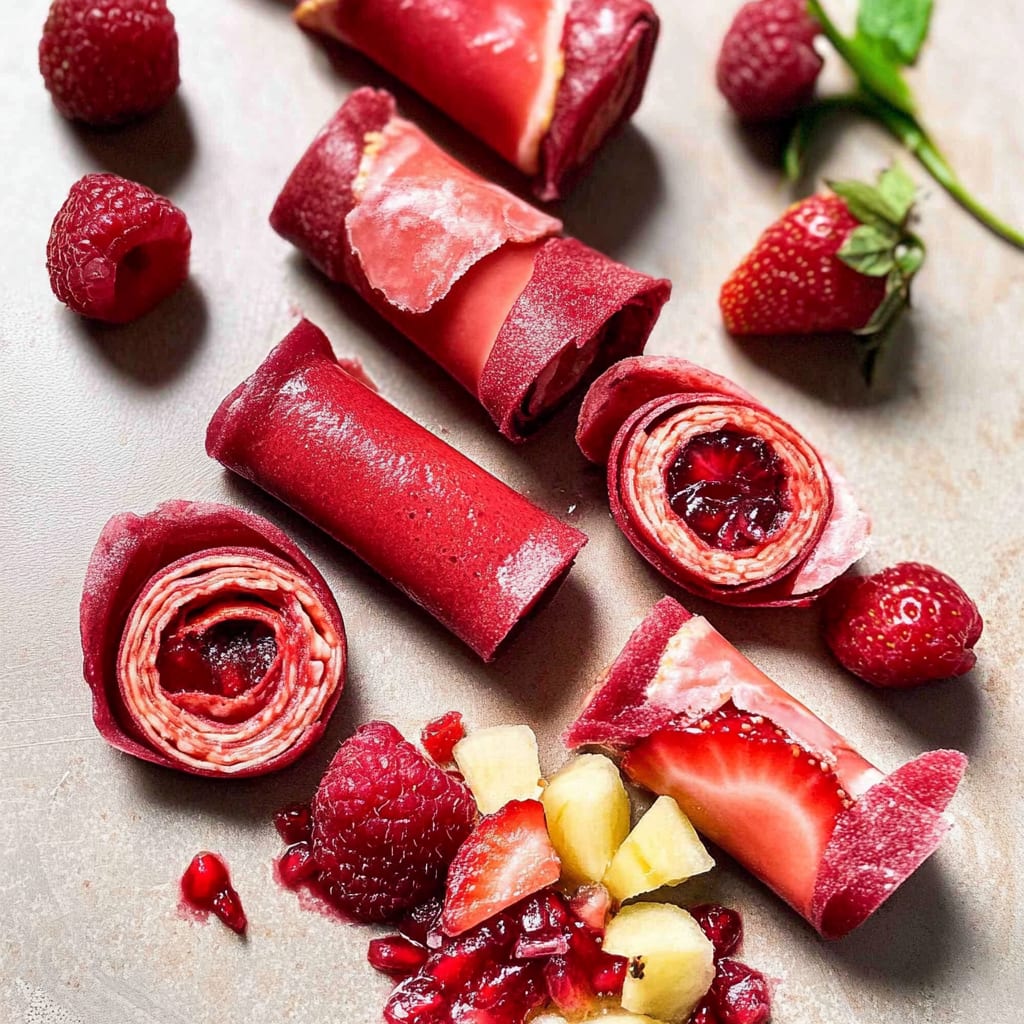
- Berry Blast: Use a mix of fresh berries like blueberries and raspberries for a tangy punch. This berry medley not only bursts with flavor but also adds vibrant color, perfect for enticing little ones.
- Spicy Kick: Add a pinch of cayenne or ginger for a surprising warmth. The gentle heat complements the sweetness of fruits, creating an intriguing balance that will keep you reaching for more.
- Nutty Crunch: Blend in a tablespoon of finely chopped nuts or seeds after pureeing for added texture. This twist offers a delightful crunch that contrasts beautifully with the smooth roll-up.
- Herbal Infusion: Incorporate fresh mint or basil into your fruit base for an aromatic twist. The herbs elevate the overall flavor profile, giving you a refreshing treat that’s perfect for warm days.
- Creamy Delight: Mix in yogurt for creamier fruit roll-ups. This addition not only enriches the texture but also provides added protein, making it an even healthier snack option.
- Citrus Zest: Experiment with different citrus juices like orange or lime to brighten up the flavors. Just a splash can enhance the overall taste and keep your roll-ups lively and zesty!
Make Ahead Options
If you’re looking to streamline your meal prep, these Healthy Fruit Roll-Ups are a fantastic choice! You can easily prepare the fruit base up to 24 hours in advance by washing and chopping your chosen fresh fruit, such as ripe strawberries, mangoes, or apples. Blending the fruit with honey (if desired) and lemon juice can also be done ahead of time; simply store the puree in an airtight container in the refrigerator until you’re ready to bake. When you’re ready to make your Healthy Fruit Roll-Ups, just preheat the oven and follow the steps: line a baking sheet with parchment paper, pour out the fruit puree, and bake for about 4-6 hours until it’s no longer sticky. This way, you save time while ensuring delicious, nutrient-packed snacks that everyone will love!
Healthy Fruit Roll-Ups Recipe FAQs
What type of fruit is best for making Healthy Fruit Roll-Ups?
Choosing ripe, fresh fruit is key for the best flavor. Strawberries, mangoes, and apples are fantastic options! You can also experiment with other fruits like peaches or pears—just ensure they’re sweet and juicy.
Can I use frozen fruit instead of fresh?
Absolutely! Just make sure to thaw the frozen fruit completely before blending. This may change the texture slightly, but it still makes for a delicious treat. Adjust the sweetness if needed since frozen fruit can sometimes be less flavorful.
How long can I store my Healthy Fruit Roll-Ups?
Once you’ve cut and rolled your fruit leather, store it in an airtight container at room temperature. It should last about 1-2 weeks. For longer storage, consider freezing them; they’ll keep well for several months!
What’s the role of lemon juice in this recipe?
Lemon juice serves two purposes: it enhances the flavor profile by adding a nice tang and helps preserve the vibrant color of your fruit roll-ups so they look appealing even after baking. It’s a small but mighty ingredient!
I’m trying to reduce sugar; can I omit the honey or maple syrup?
Definitely! If your chosen fruit is sweet enough on its own, feel free to leave out the honey or maple syrup entirely. Just remember to taste your puree before baking; you want that perfect balance of flavors!
What if my fruit leather is still sticky after baking?
If you’re finding that your fruit leather isn’t drying out as expected, simply return it to the oven for an additional 30-60 minutes. Keep an eye on it to avoid over-drying; it should be pliable but not tacky when done—perfectly chewy and ready to roll!