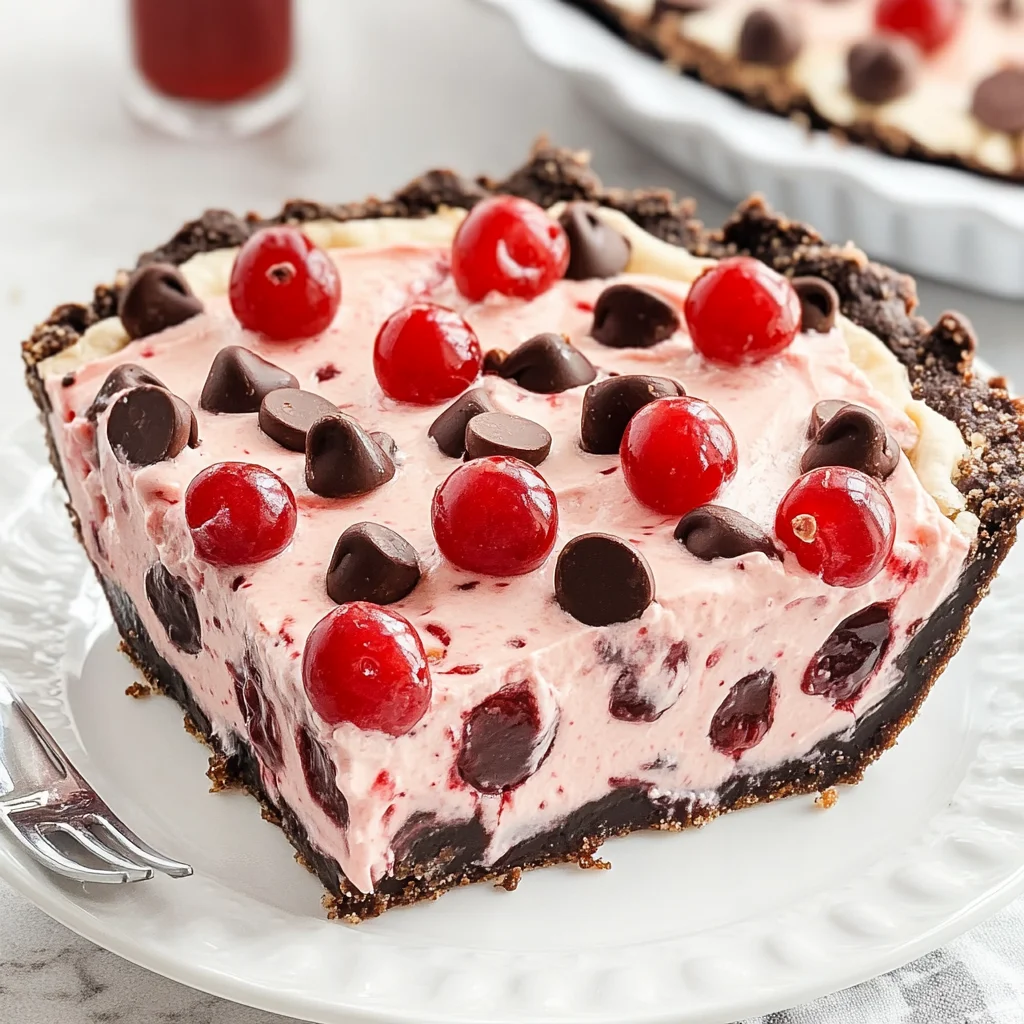
Imagine sinking your fork into a slice of Cherry Chocolate Chip Pie, where the sweet-tart burst of ripe cherries dances with the rich, velvety chocolate in a buttery crust. The aroma wafts through the air like a warm hug, drawing you in and making your mouth water in anticipation of that first heavenly bite.
Jump to:
- Why is Cherry Chocolate Chip Pie so irresistible?
- Cherry Chocolate Chip Pie Ingredients
- How to Make Cherry Chocolate Chip Pie
- Expert Tips for Cherry Chocolate Chip Pie
- How to Store and Freeze Cherry Chocolate Chip Pie
- Cherry Chocolate Chip Pie Twists
- Make Ahead Options
- Cherry Chocolate Chip Pie Recipe FAQs
This delightful dessert isn?t just about flavors; it?s a cherished memory from summer picnics with family, where laughter mixed with the scent of fresh cherries. Picture yourself enjoying this pie at gatherings or cozy evenings at home, each slice delivering an unforgettable experience that promises to tickle your taste buds and warm your heart.
Why is Cherry Chocolate Chip Pie so irresistible?
Deliciously unique: This pie combines sweet cherries and rich chocolate chips for a flavor explosion that will captivate your taste buds.
Super easy: With just a few simple ingredients, you can whip up this delightful dessert in no time!
Versatile treat: Perfect for any occasion, from family gatherings to potlucks?everyone will be asking for seconds!
Time-saving: Bake it ahead and serve it warm or cold; it?s delicious either way!
Crowd favorite: Watch as friends and family rave about this unforgettable twist on traditional pie.
Cherry Chocolate Chip Pie Ingredients
For the Pie Crust
- All-purpose flour ? a staple for creating a tender, flaky crust.
- Unsalted butter ? ensures the perfect richness; make sure it?s chilled for best results.
- Granulated sugar ? adds just a hint of sweetness to balance the flavors.
- Ice water ? helps bind the dough together without making it sticky.
For the Filling
- Fresh cherries ? pitted and chopped, they bring vibrant flavor and natural sweetness to your pie.
- Semi-sweet chocolate chips ? these add decadent pockets of chocolate that melt beautifully in every bite.
- Granulated sugar ? sweetens the filling; adjust based on how sweet your cherries are.
- Cornstarch ? thickens the filling and prevents it from being too runny.
- Lemon juice ? brightens up the flavors and balances the sweetness of the cherries.
For Serving (Optional)
- Whipped cream ? a dollop adds a light, airy contrast to the rich filling.
- Chocolate shavings ? a fun garnish that enhances the chocolate flavor in your Cherry Chocolate Chip Pie!
How to Make Cherry Chocolate Chip Pie
1. Preheat your oven to 375?F. This will ensure your pie crust bakes evenly and crisps up beautifully while you prepare the filling.
2. Prepare the pie crust by rolling it out and placing it into a 9-inch pie dish. Gently press it down and trim any excess edges for a neat finish.
3. Mix together fresh or canned cherries with chocolate chips in a bowl. Stir until the cherries are well coated, creating a deliciously sweet base for your pie.
4. Combine sugar, cornstarch, and vanilla extract in another bowl. This mixture will thicken the cherry filling as it bakes, giving you that perfect texture.
5. Fold the cherry mixture into the sugar blend gently until everything is evenly coated. The vibrant colors should pop, promising a delightful dessert ahead!
6. Pour the cherry filling into the prepared pie crust, spreading it out evenly. Make sure to leave some space at the top for bubbling goodness while it bakes.
7. Bake in your preheated oven for 45-50 minutes or until the filling is bubbly and the crust is golden brown. Keep an eye on it towards the end!
8. Cool the pie on a wire rack for at least 30 minutes before slicing. This allows the filling to set perfectly, making each slice beautiful.
Optional: Serve warm with a scoop of vanilla ice cream for an extra indulgent treat!
Exact quantities are listed in the recipe card below.
Expert Tips for Cherry Chocolate Chip Pie
- Use Fresh Cherries: Opt for fresh, ripe cherries for the best flavor. If using frozen, ensure they are well-drained to avoid excess moisture.
- Perfect Pie Crust: Blind bake your pie crust for 10 minutes before adding the filling. This prevents a soggy bottom in your Cherry Chocolate Chip Pie!
- Chocolate Quality Matters: Choose high-quality chocolate chips for richer flavor. Dark chocolate adds a wonderful contrast to the sweetness of the cherries.
- Sweetness Balance: Taste your filling before baking. Depending on the tartness of your cherries, you may need to adjust the sugar for a perfect balance.
- Cooling Time: Allow the pie to cool completely before slicing. This helps set the filling and makes serving easier without mess.
How to Store and Freeze Cherry Chocolate Chip Pie
Room Temperature: Enjoy your Cherry Chocolate Chip Pie for up to 2 days at room temperature, covered with a clean kitchen towel or plastic wrap to keep it fresh.
Fridge: Store in the refrigerator for up to 5 days. Keep it covered with plastic wrap or in an airtight container to maintain its delightful flavor and texture.
Freezer: For longer storage, freeze your pie wrapped tightly in plastic wrap and then in aluminum foil for up to 3 months. Thaw overnight in the fridge before enjoying.
Reheating: To reheat, place slices in a preheated oven at 350?F (175?C) for about 10-15 minutes until warmed through. This will revive that luscious cherry and chocolate combination!
Cherry Chocolate Chip Pie Twists
Unleash your creativity in the kitchen with delightful variations that elevate this classic dessert to new heights!
- Gluten-Free: Substitute regular flour with a 1:1 gluten-free blend for a deliciously inclusive treat. Your gluten-sensitive loved ones will appreciate the effort!
- Vegan: Use flaxseed meal mixed with water instead of eggs, and swap butter for coconut oil. This version is just as rich and satisfying.
- Nutty Crunch: Incorporate chopped pecans or walnuts into the filling for an added layer of texture and flavor. The nuttiness beautifully complements the sweetness of the cherries.
- Spicy Kick: Add a dash of cayenne pepper to the chocolate chips for a surprising heat that pairs wonderfully with the cherries. It’s a daring twist that will delight adventurous eaters!
- Coconut Bliss: Mix shredded coconut into the pie crust or filling for a tropical flair that brightens every bite. The coconut adds a chewy texture that’s divine.
- Creamy Layer: Top your pie with whipped cream or a dollop of mascarpone cheese after baking for an indulgent finish. It transforms each slice into a luxurious experience.
- Berry Medley: Blend in other berries like raspberries or blueberries for a colorful, fruity explosion. The mix enhances both flavor and visual appeal, making it extra festive.
- Mint Infusion: Sprinkle fresh mint leaves on top before serving to introduce a refreshing element that perfectly balances the rich chocolate. It?s like summer on your plate!
Make Ahead Options
Cherry Chocolate Chip Pie is the perfect dessert for meal prep, allowing you to savor its deliciousness without the last-minute rush. You can prepare the pie crust and filling up to 24 hours in advance. Simply make your crust, wrap it tightly in plastic wrap, and refrigerate. For the filling, mix together the cherries and chocolate chips, then store it in an airtight container in the fridge for no more than 3 days. When you’re ready to bake, just roll out the chilled dough, fill it with the prepared mixture, and pop it into the oven. To maintain that fresh taste and texture, avoid soggy crusts by assembling the pie right before baking. Enjoy this time-saving tip as you bring your Cherry Chocolate Chip Pie to life with ease!
Cherry Chocolate Chip Pie Recipe FAQs
What type of cherries should I use for my Cherry Chocolate Chip Pie?
Fresh, ripe sweet cherries are ideal for this pie, as they bring a delightful sweetness and depth of flavor. If you can’t find fresh cherries, frozen pitted cherries work well too?just make sure to thaw and drain them before using to avoid excess moisture in your pie.
How should I store my Cherry Chocolate Chip Pie?
To keep your pie fresh, store it in the refrigerator covered with plastic wrap or aluminum foil. It will stay delicious for about 3-4 days. If you want to enjoy it longer, consider freezing it (see below!).
Can I freeze Cherry Chocolate Chip Pie?
Absolutely! You can freeze your pie after baking it. Just let it cool completely, then wrap it tightly in plastic wrap and aluminum foil. It will maintain its flavor for up to 2 months in the freezer. When you’re ready to enjoy, thaw it overnight in the fridge and reheat gently in the oven at 350?F (175?C) for about 15 minutes.
What should I do if my pie crust is too soggy?
A soggy crust can be disappointing, but it often happens when there’s too much moisture from the filling. To prevent this, make sure to drain any excess liquid from the cherries before adding them to the pie. Additionally, blind baking the crust for about 10 minutes before adding the filling helps create a barrier against moisture.
Is there a gluten-free option for this Cherry Chocolate Chip Pie?
Yes! You can easily make a gluten-free version by substituting regular flour with a gluten-free all-purpose blend that includes xanthan gum. Most blends work seamlessly in pie recipes and will give you that lovely flaky texture without sacrificing taste.
Can I use dark chocolate instead of semi-sweet chocolate chips?
Definitely! Dark chocolate adds a rich and decadent flavor that pairs beautifully with the tartness of the cherries. You can also experiment with milk chocolate if you prefer something sweeter?just remember that it will alter the overall taste profile of your pie slightly!
Cherry Chocolate Chip Pie
Ingredients
Method
- Preheat your oven to 375?F.
- Prepare the pie crust by rolling it out and placing it into a 9-inch pie dish.
- Mix together fresh or canned cherries with chocolate chips in a bowl.
- Combine sugar, cornstarch, and lemon juice in another bowl.
- Fold the cherry mixture into the sugar blend gently until evenly coated.
- Pour the cherry filling into the prepared pie crust, spreading it out evenly.
- Bake in your preheated oven for 45-50 minutes or until the filling is bubbly and the crust is golden brown.
- Cool the pie on a wire rack for at least 30 minutes before slicing.